How to set up electric wooden blinds
Ready to enjoy the convenience of your new electric wooden blinds? This easy-to-follow guide walks you through setting up your blinds, pairing remotes, setting channels, and adjusting settings.
How do electric wooden blinds work?
Electric wooden blinds work using a small motor hidden in the wooden blind headrail. This motor is powered by a rechargeable battery, so there are no messy wires to worry about. When you press a button on the remote control or your smartphone app, the motor tilts the slats or raises and lowers the blinds smoothly and quietly. You can also set timers to automatically open and close your blinds at specific times, or even integrate them with your smart home system for voice control.
Tools you can use:


PDF Guides:
How to operate a remote
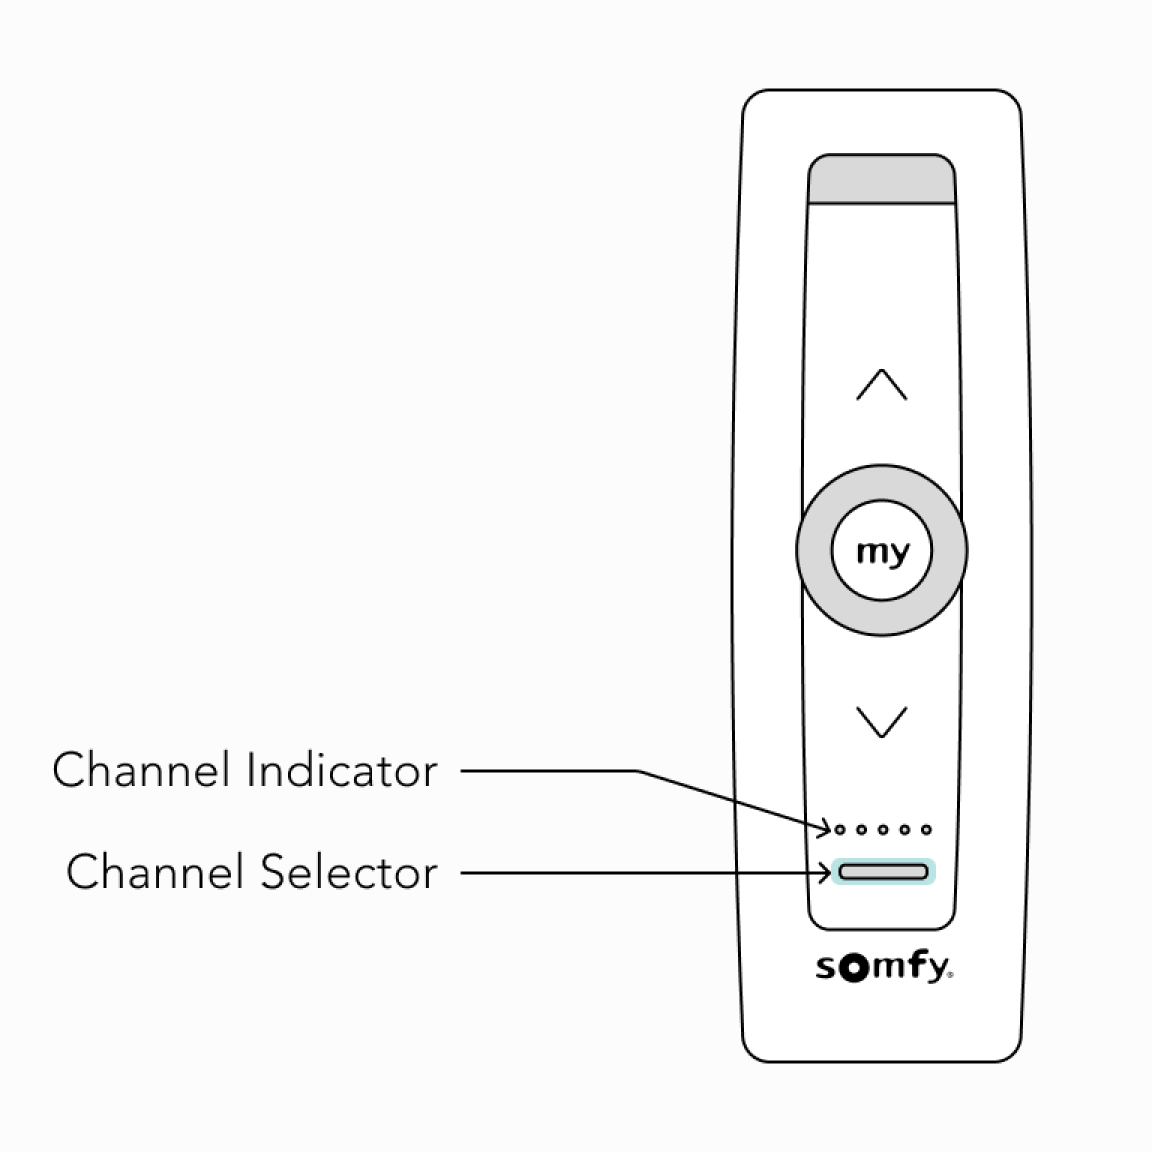
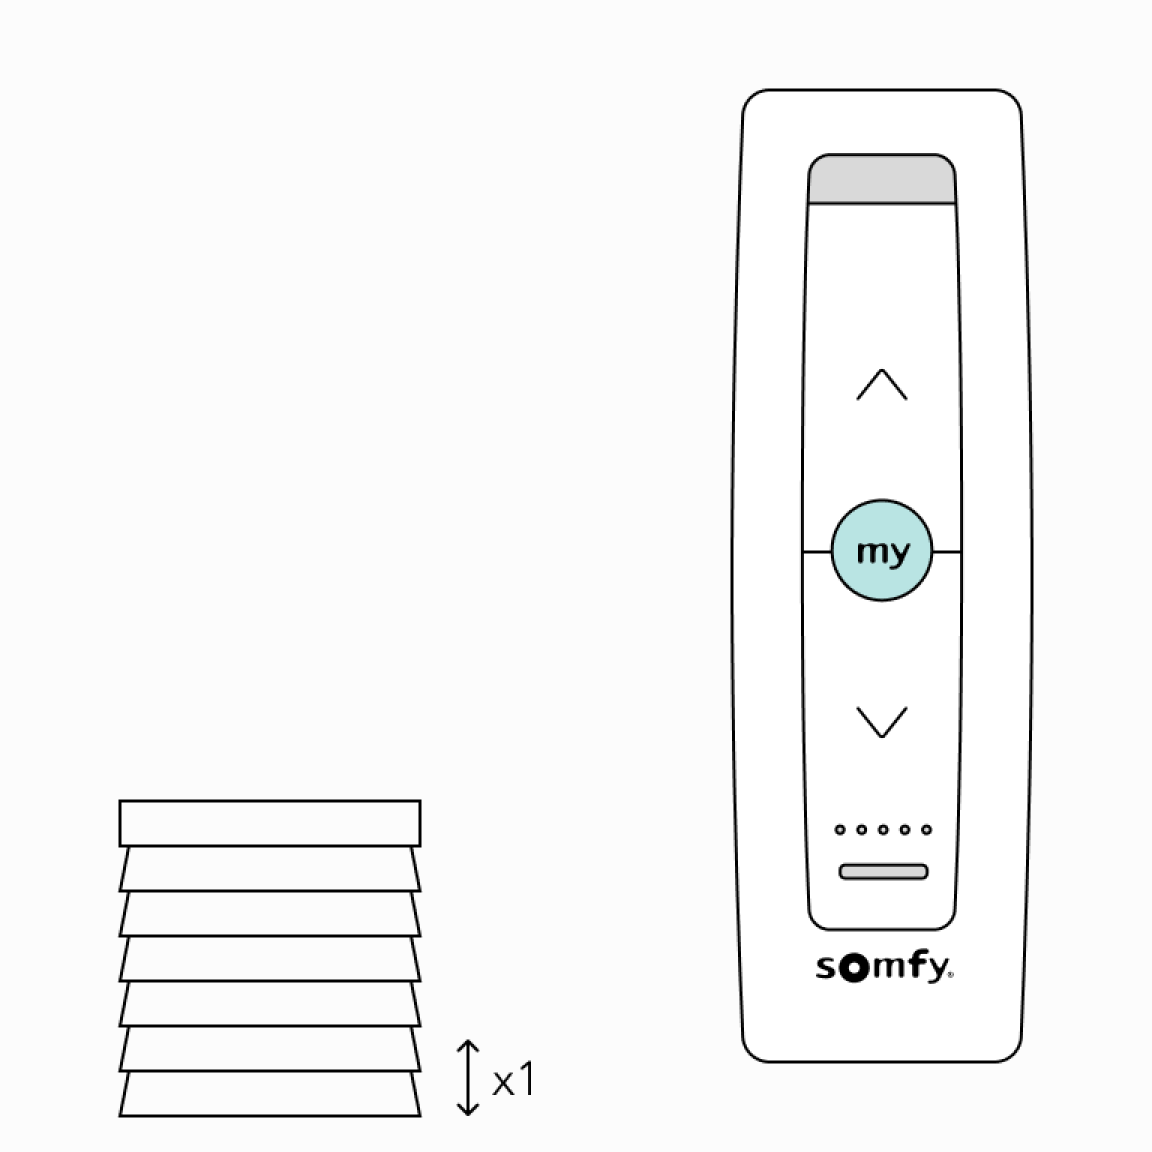
Single Channel Remotes
Situo RTS
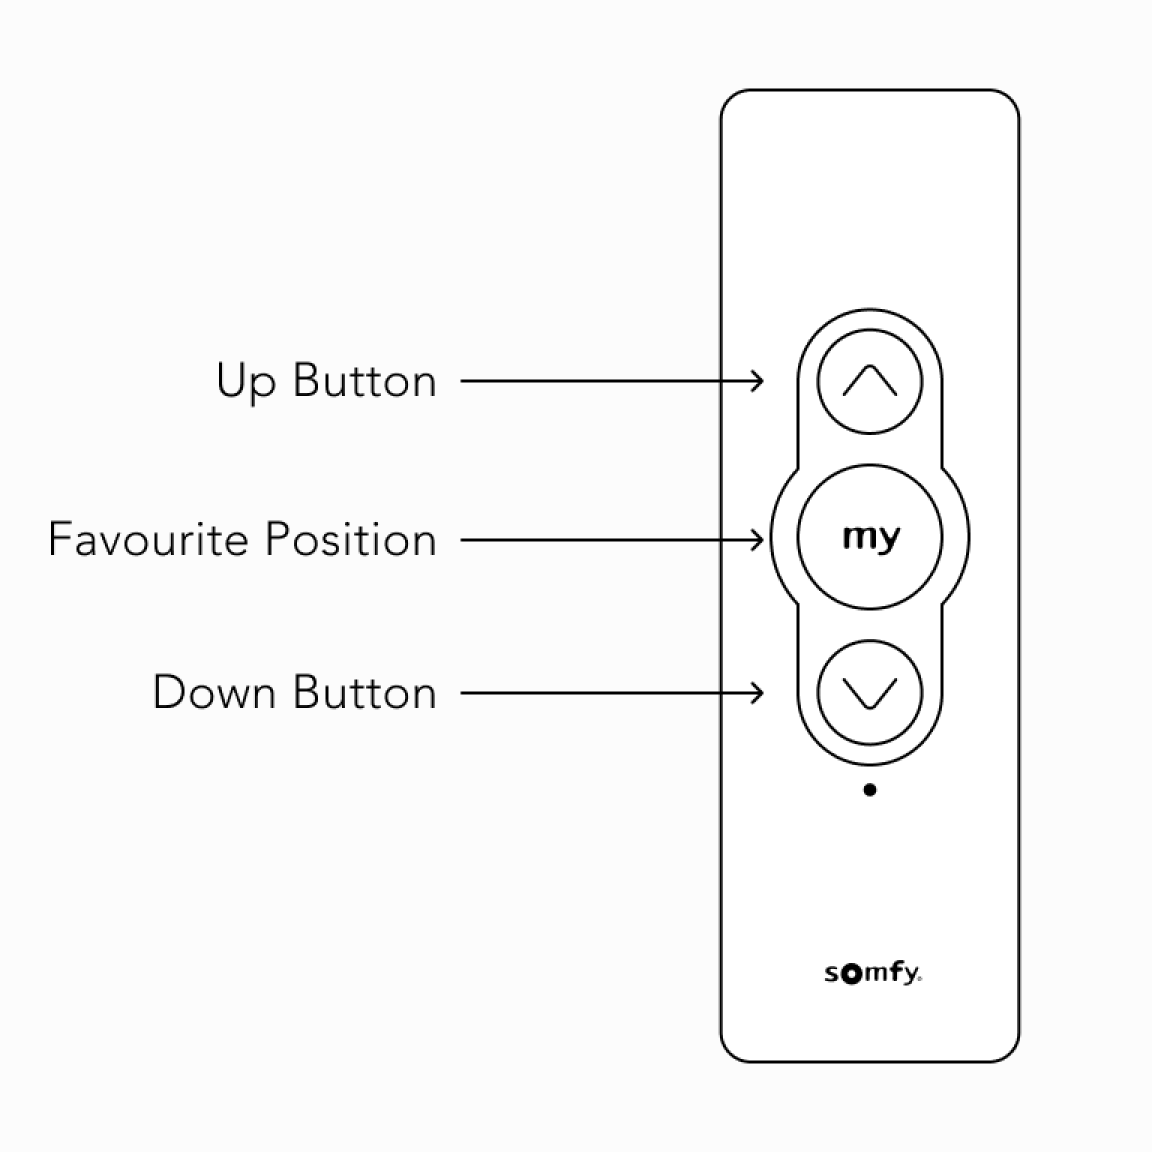
Situo 1 RTS
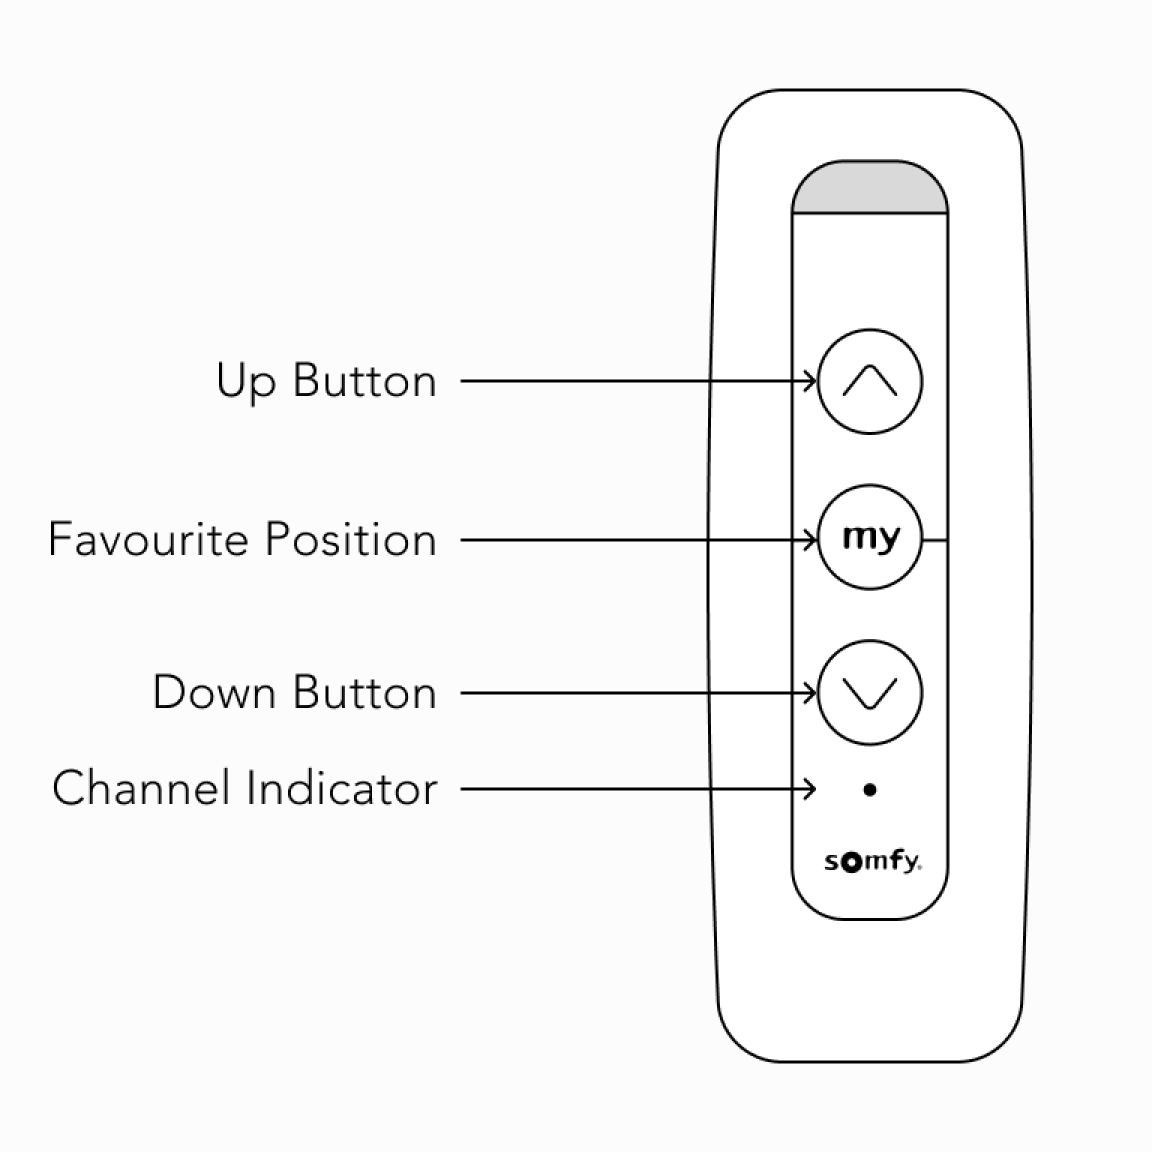
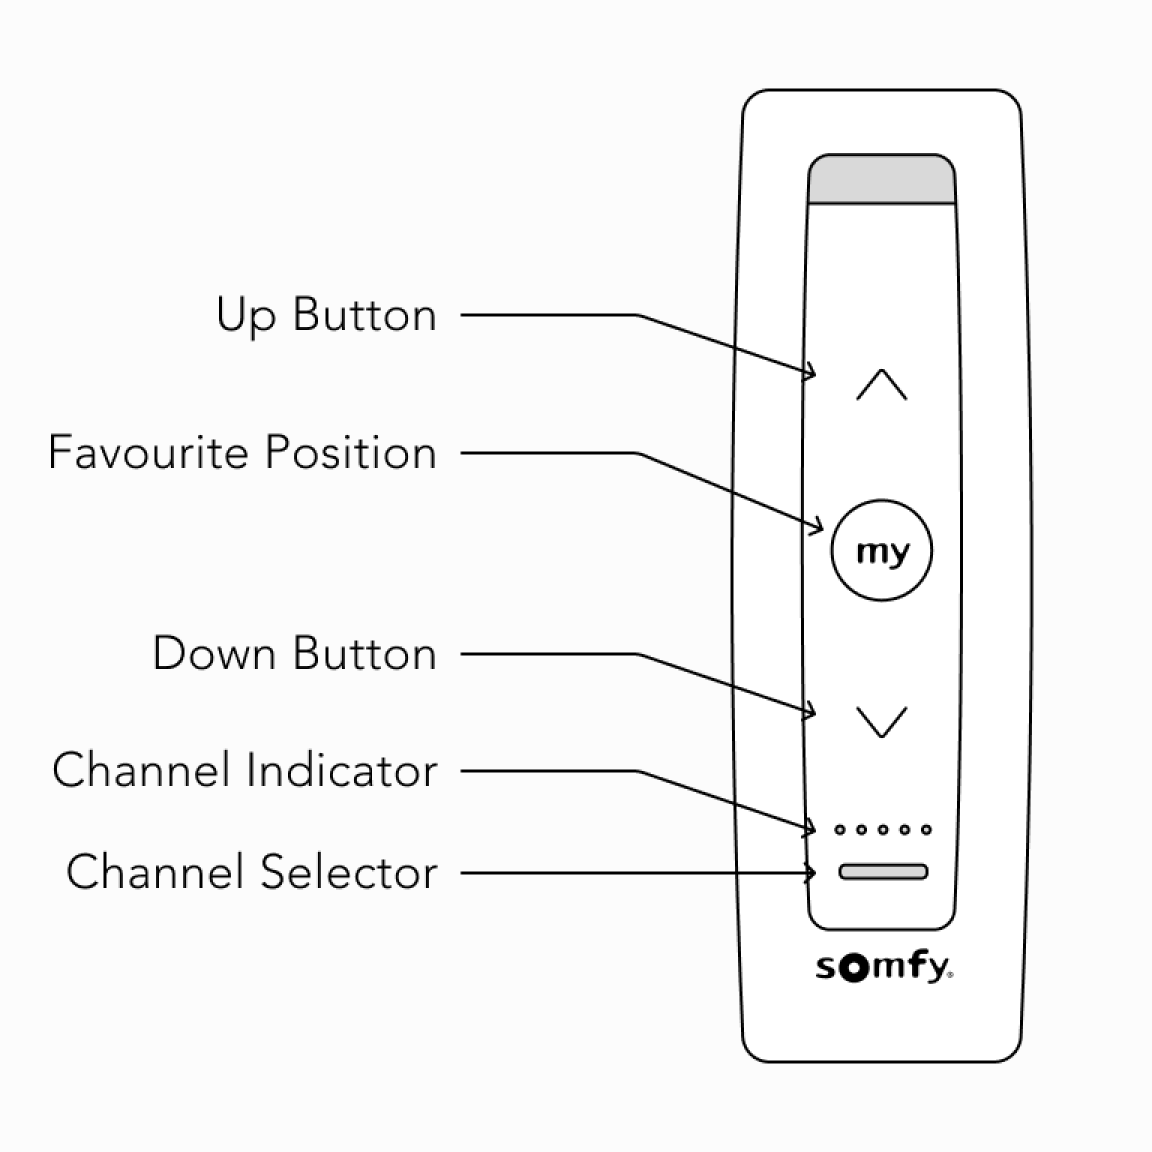
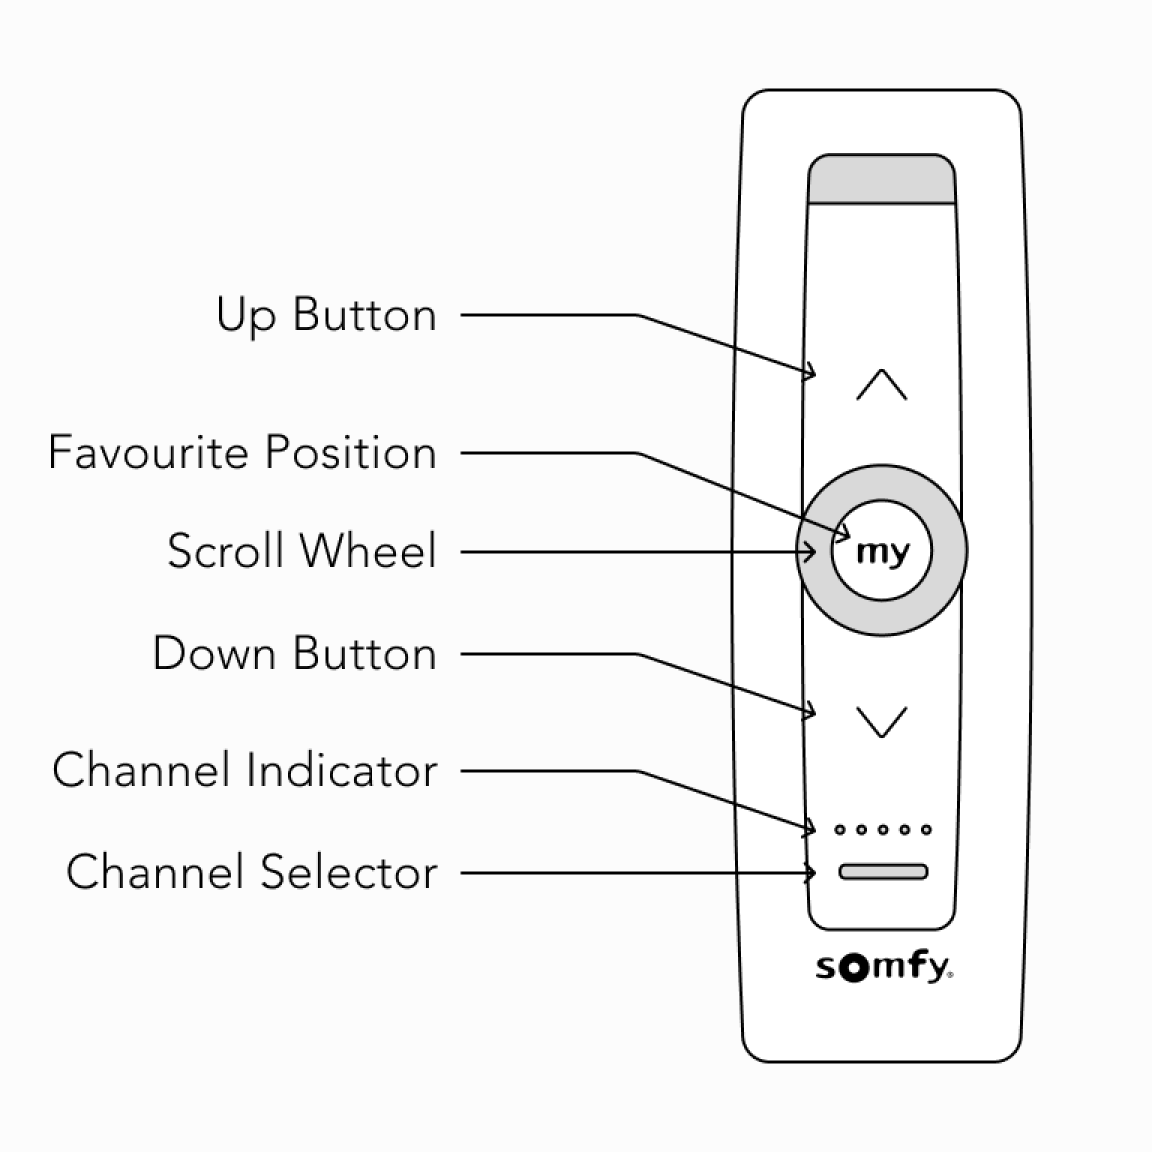
Multi Channel Remotes
Situo 5 RTS
Situo 5 VAR RTS
How to program electric wooden blinds
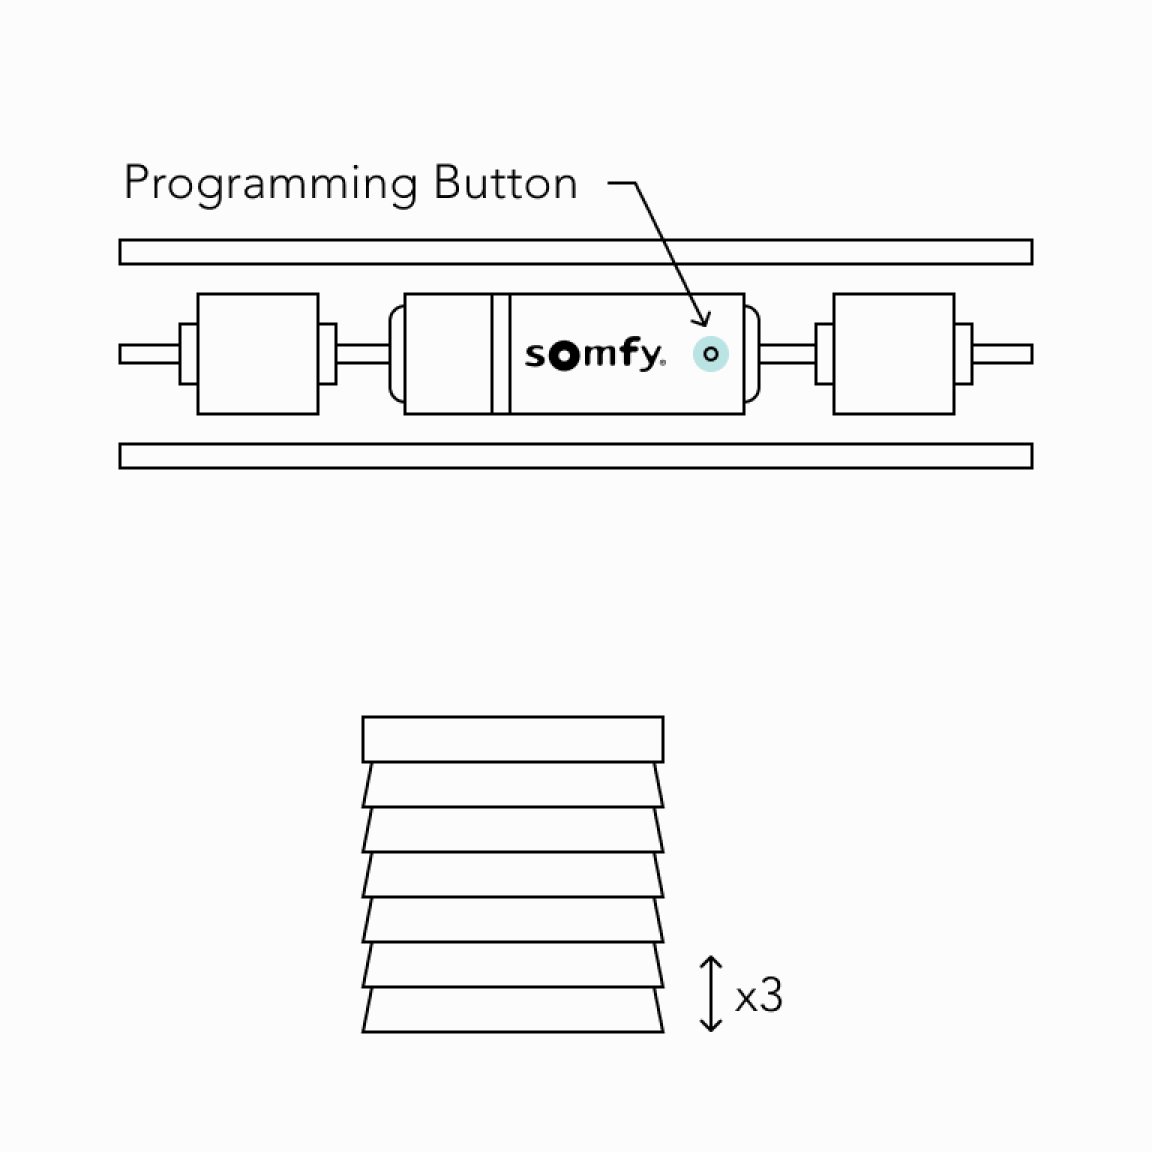
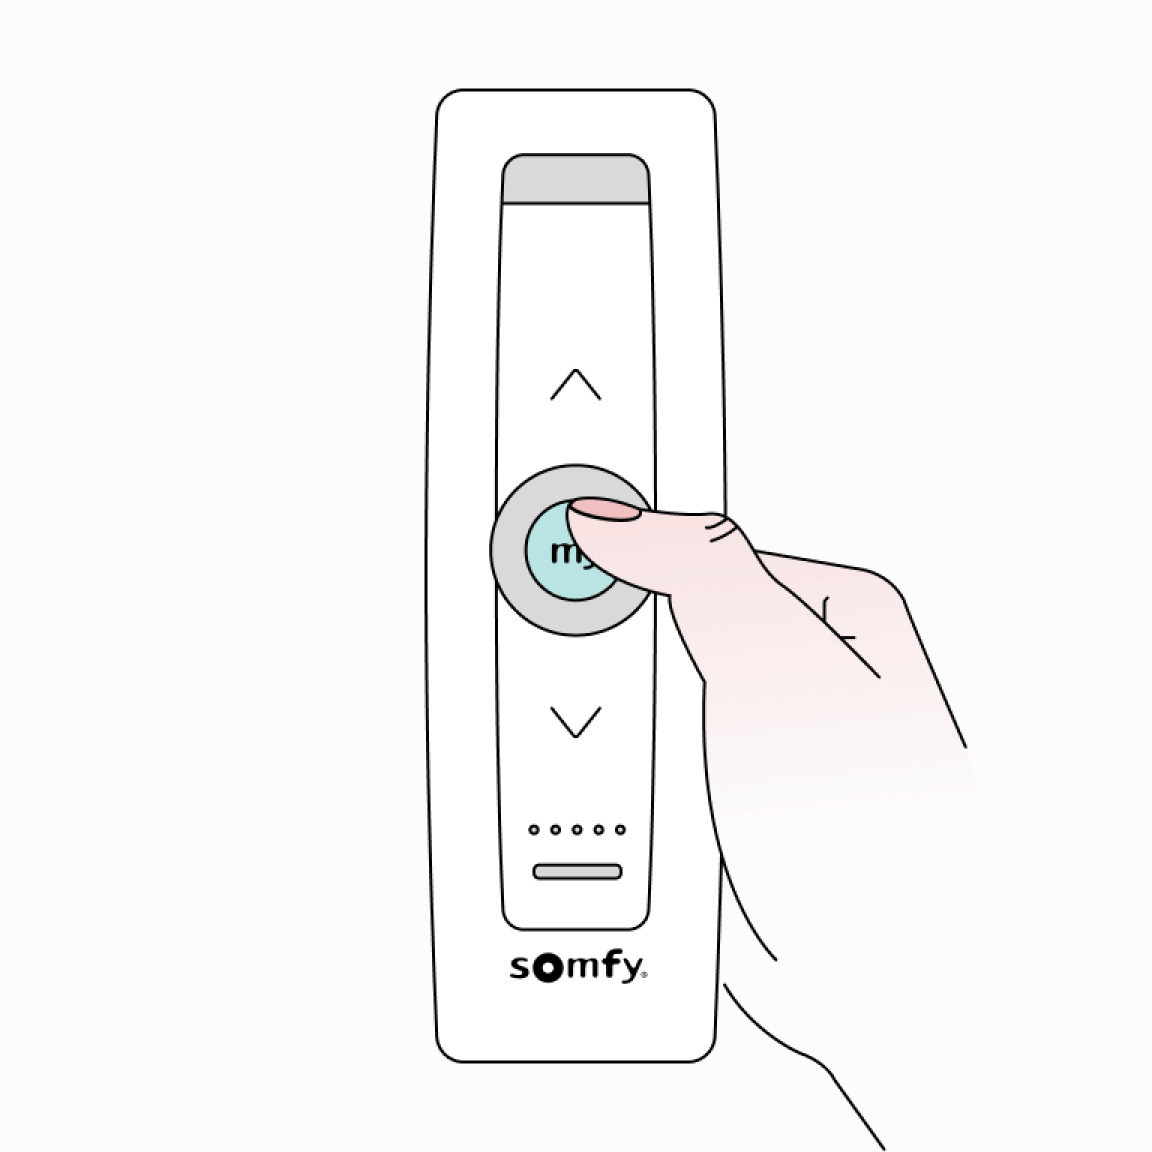
How to pair a remote with a motor
*When programming the motor the blind will be required to jog to confirm settings have been programmed, if the blind does not jog press the program button on the motor briefly until the blind jogs once.
*Power should be only connected to the blind being programmed. All other blinds should be disconnected from their respective power while programming is in progress.
Single Channel Remote

1
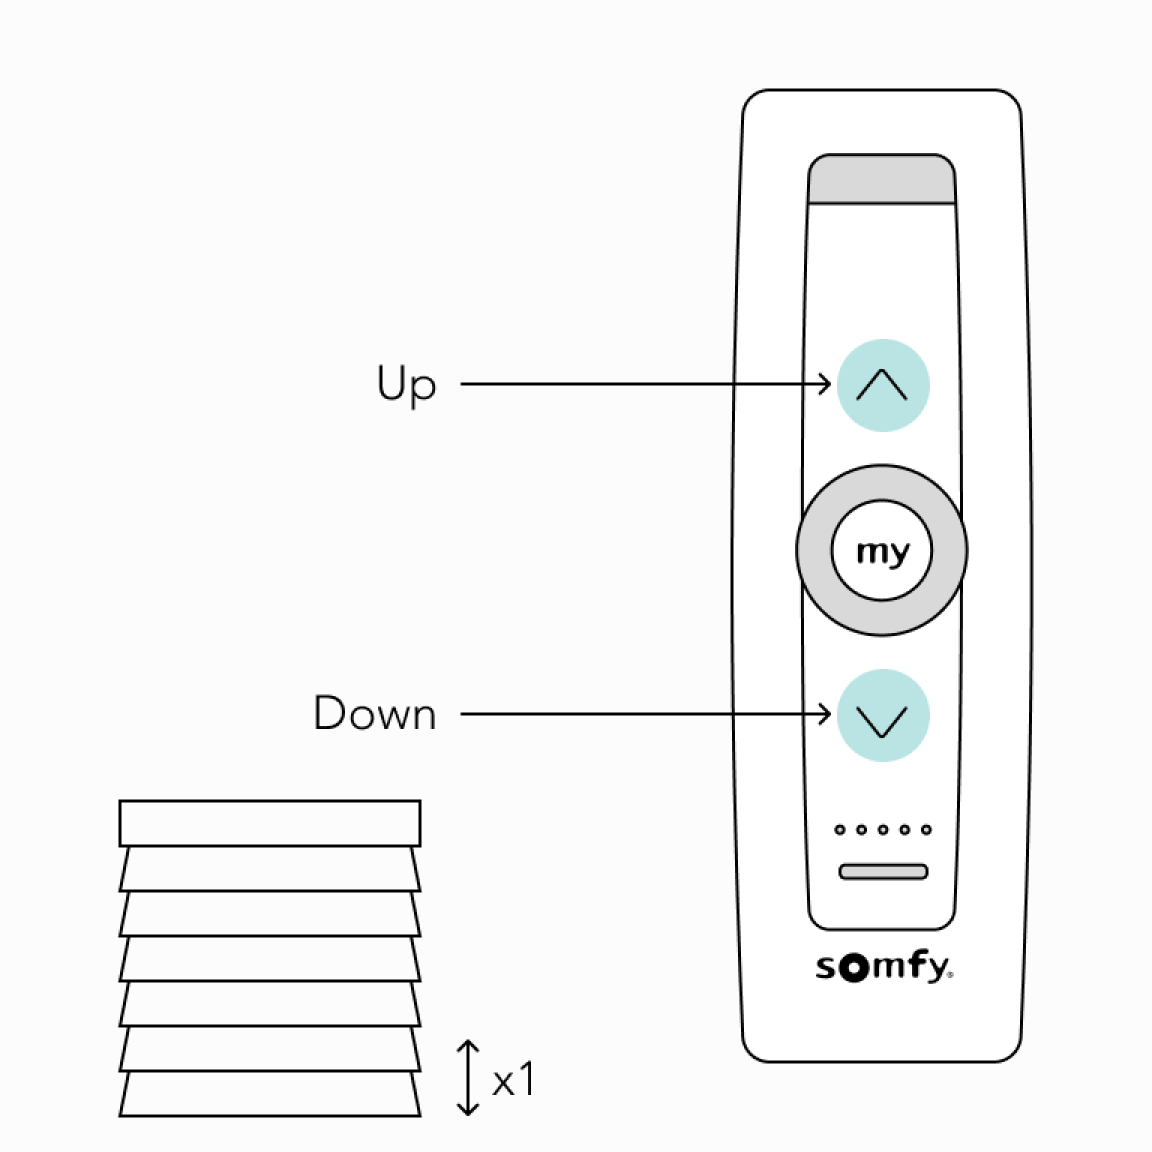
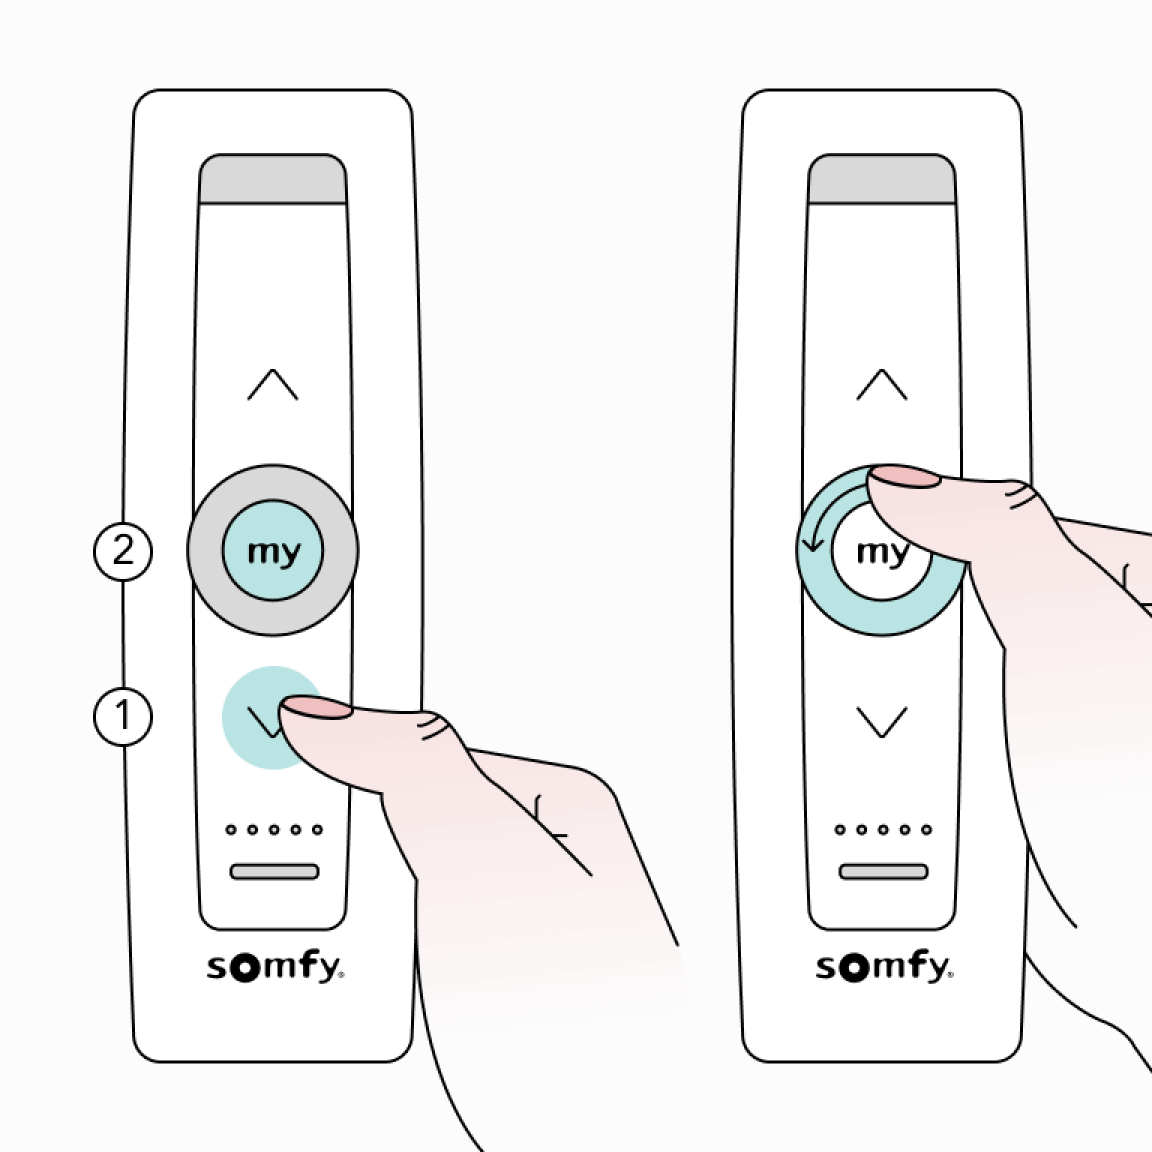
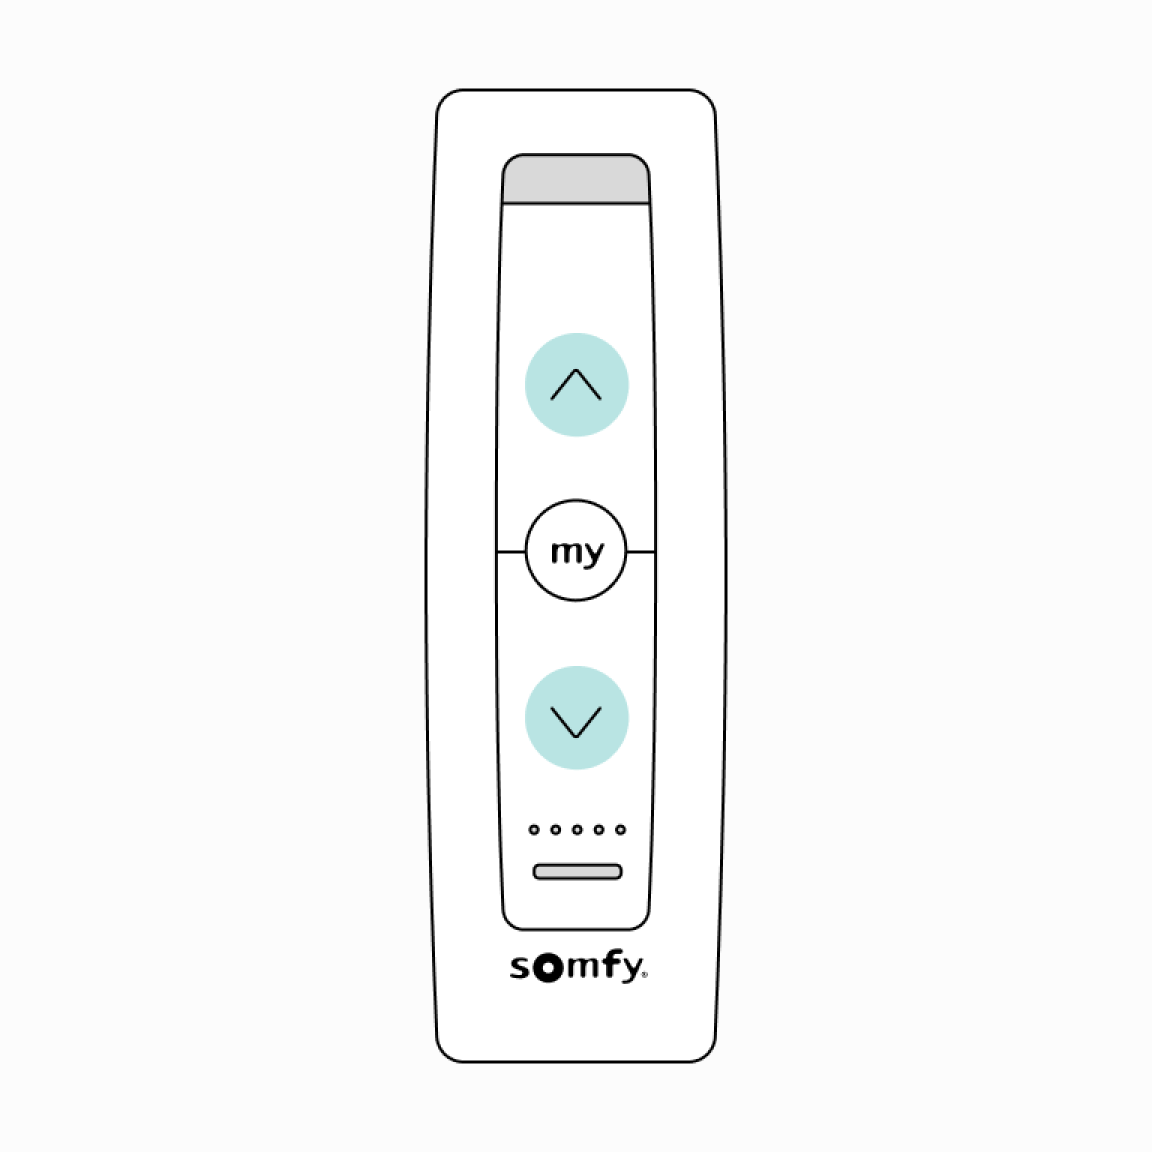
On the remote, press and hold the UP and DOWN buttons simultaneously until the blind jogs.
Multi-Channel Remote
1
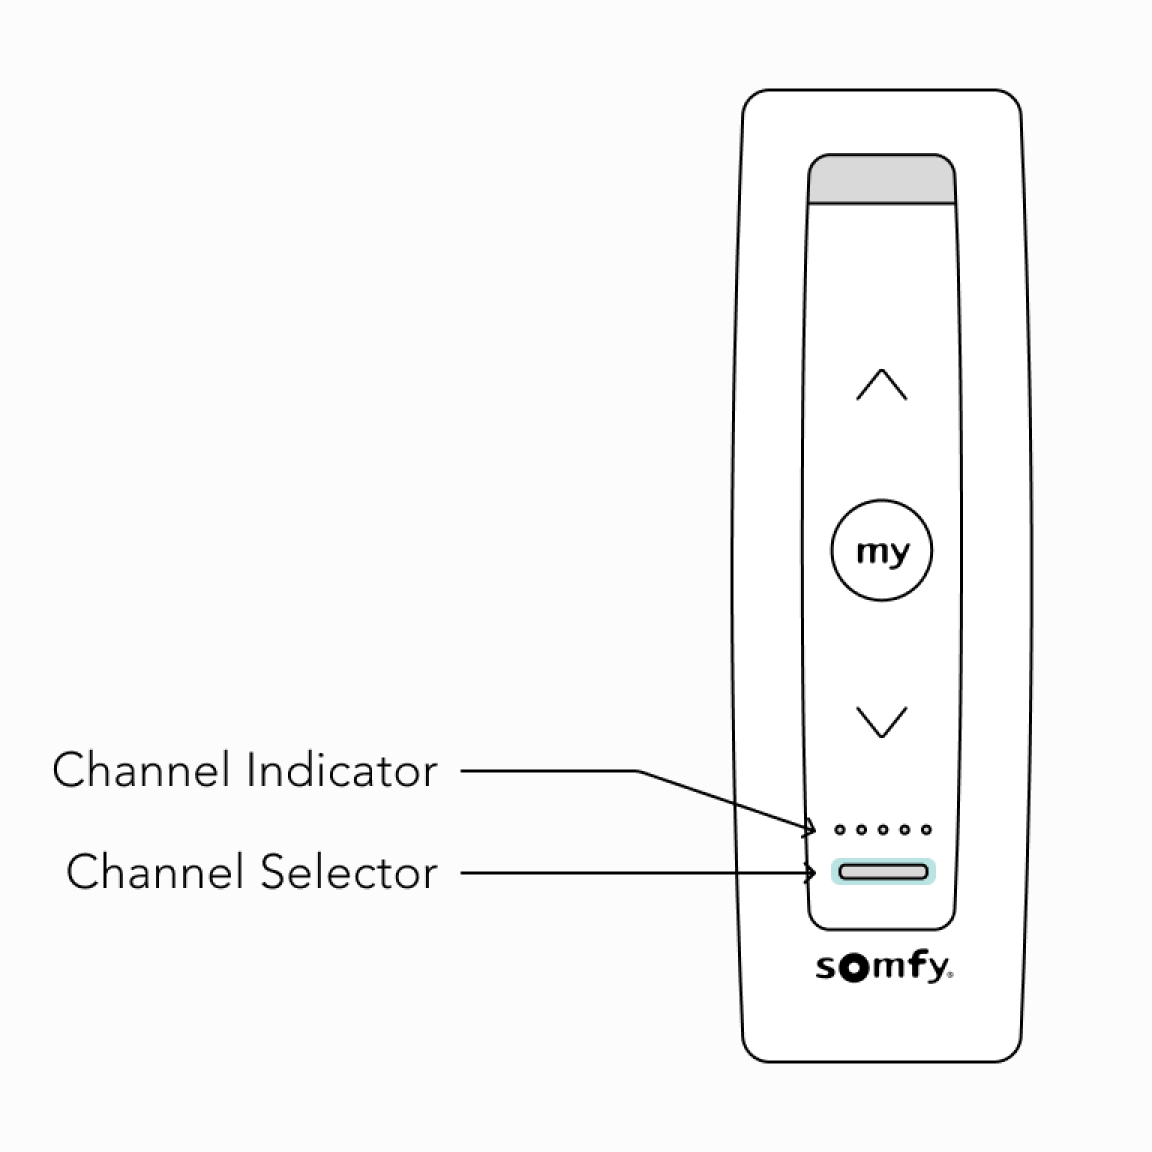
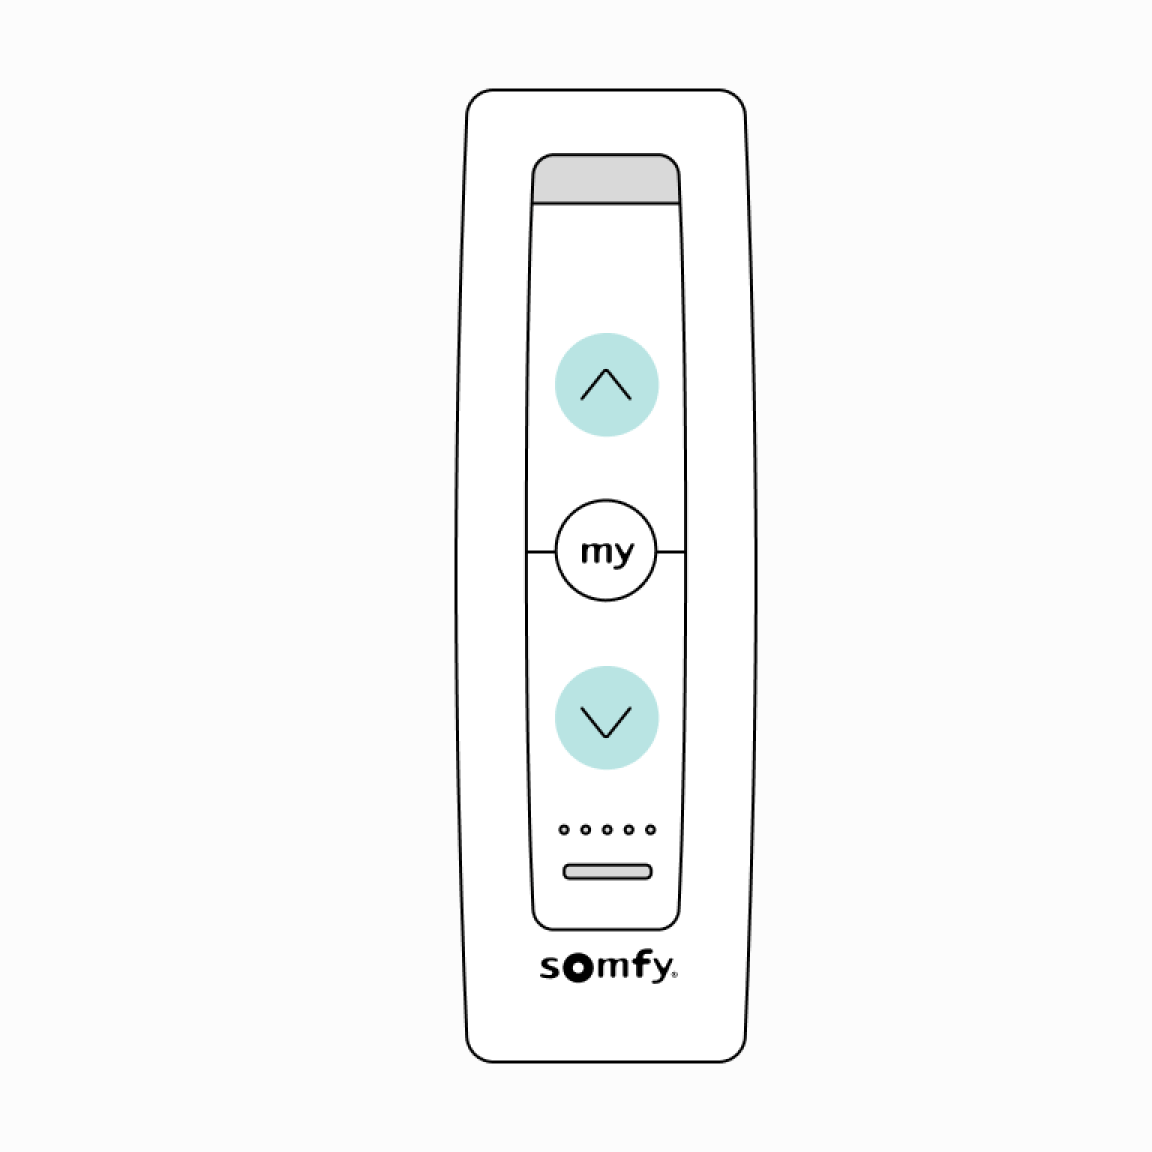
Using the Channel Selector select the desired channel (channel indicator will briefly be lit).
Multi-Channel Remote
2
On the remote, press and hold the UP and DOWN buttons simultaneously until the blind jogs.
How to pair a second remote with a motor
*Note: Finish programming the first remote before pairing a second remote
Single & Multi - Channel Remote

1
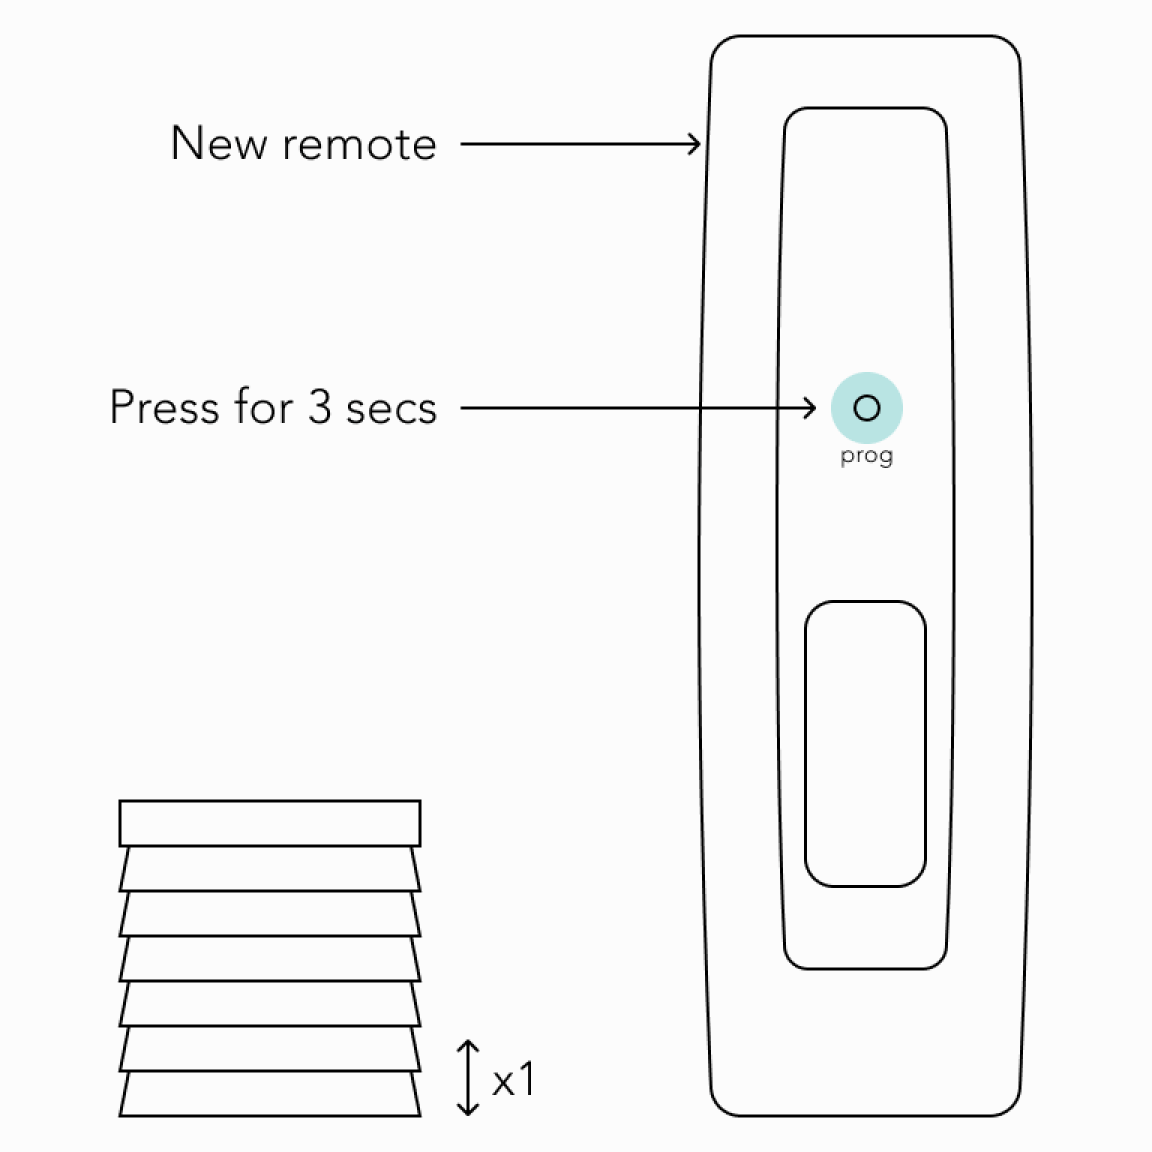
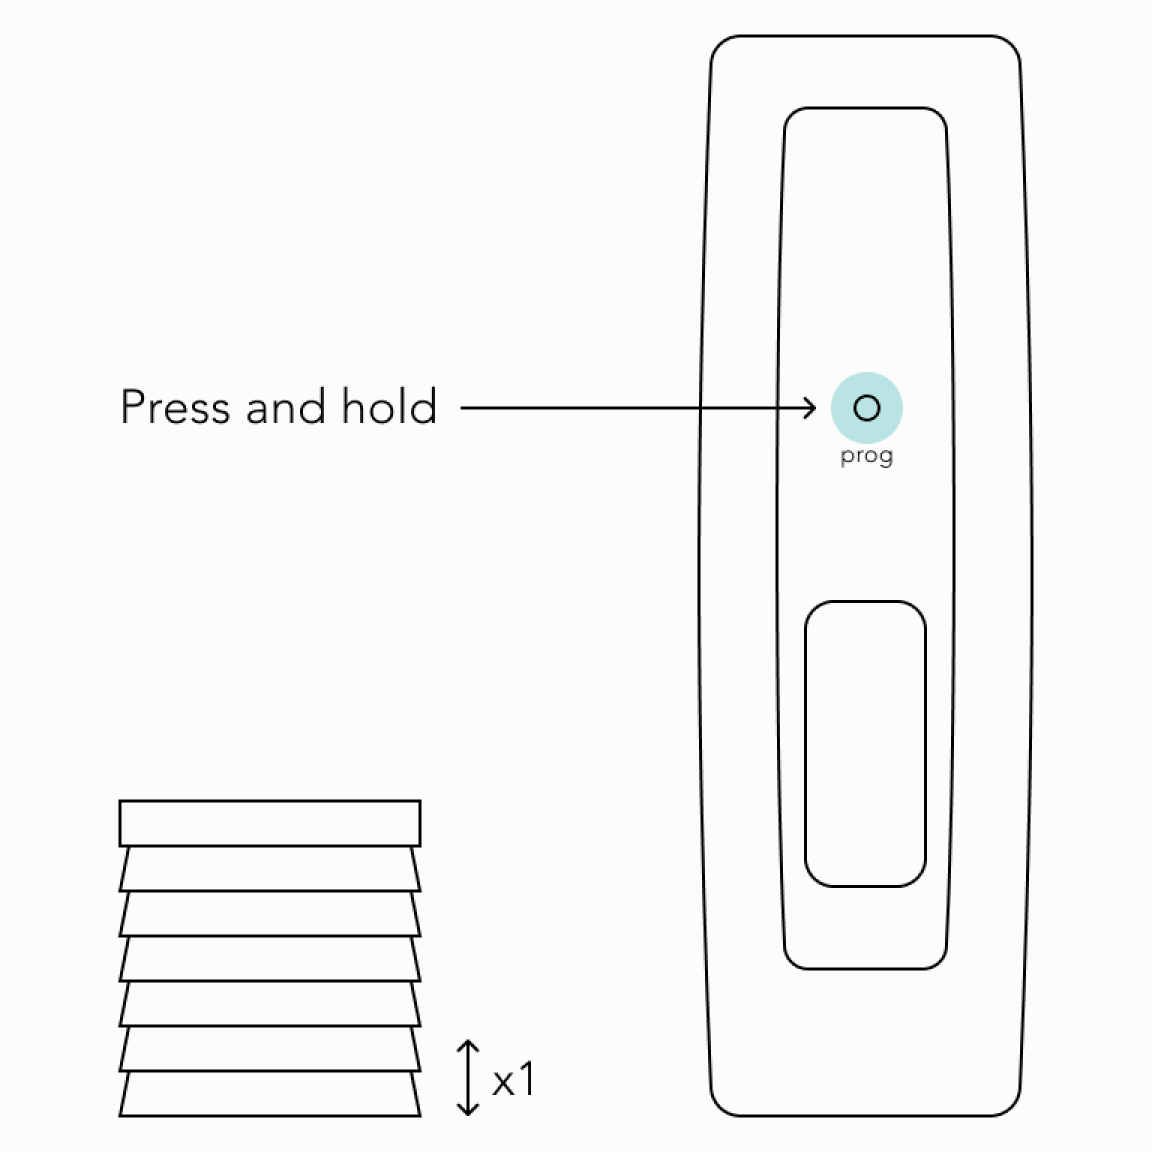
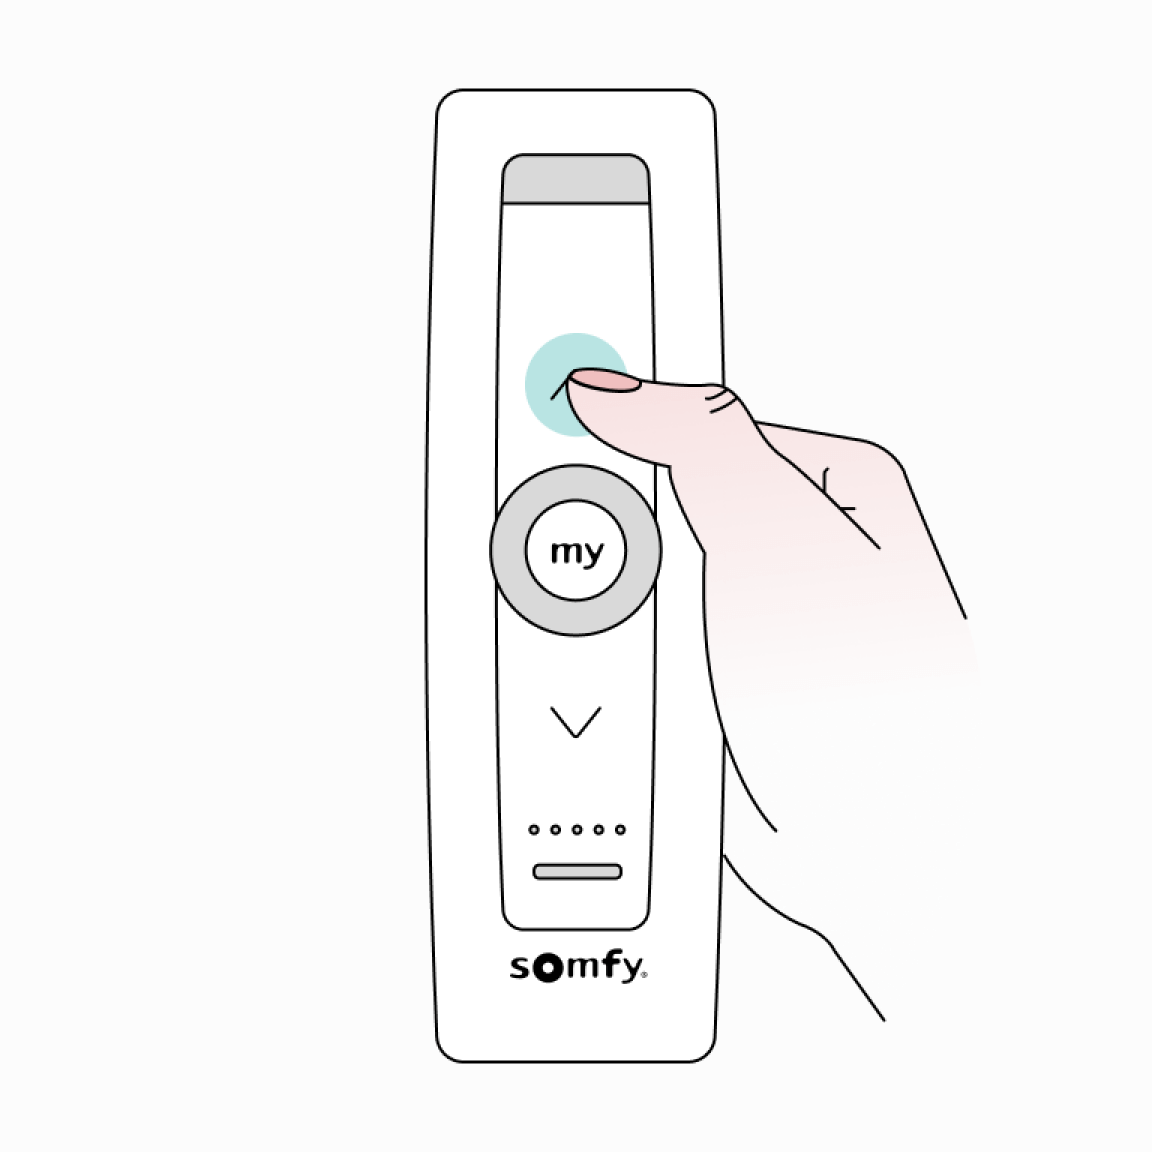
Using a paperclip or pen, press and hold the PROGRAM button on the original remote until the blind jogs once.
Single & Multi - Channel Remote
2
Using a paperclip or pen, press and hold the PROGRAM button on the new remote until the blind jogs once.
The second remote is now added to the memory and can be used to operate the blind.
How to delete a remote from the motor memory
Single & Multi - Channel Remote

1
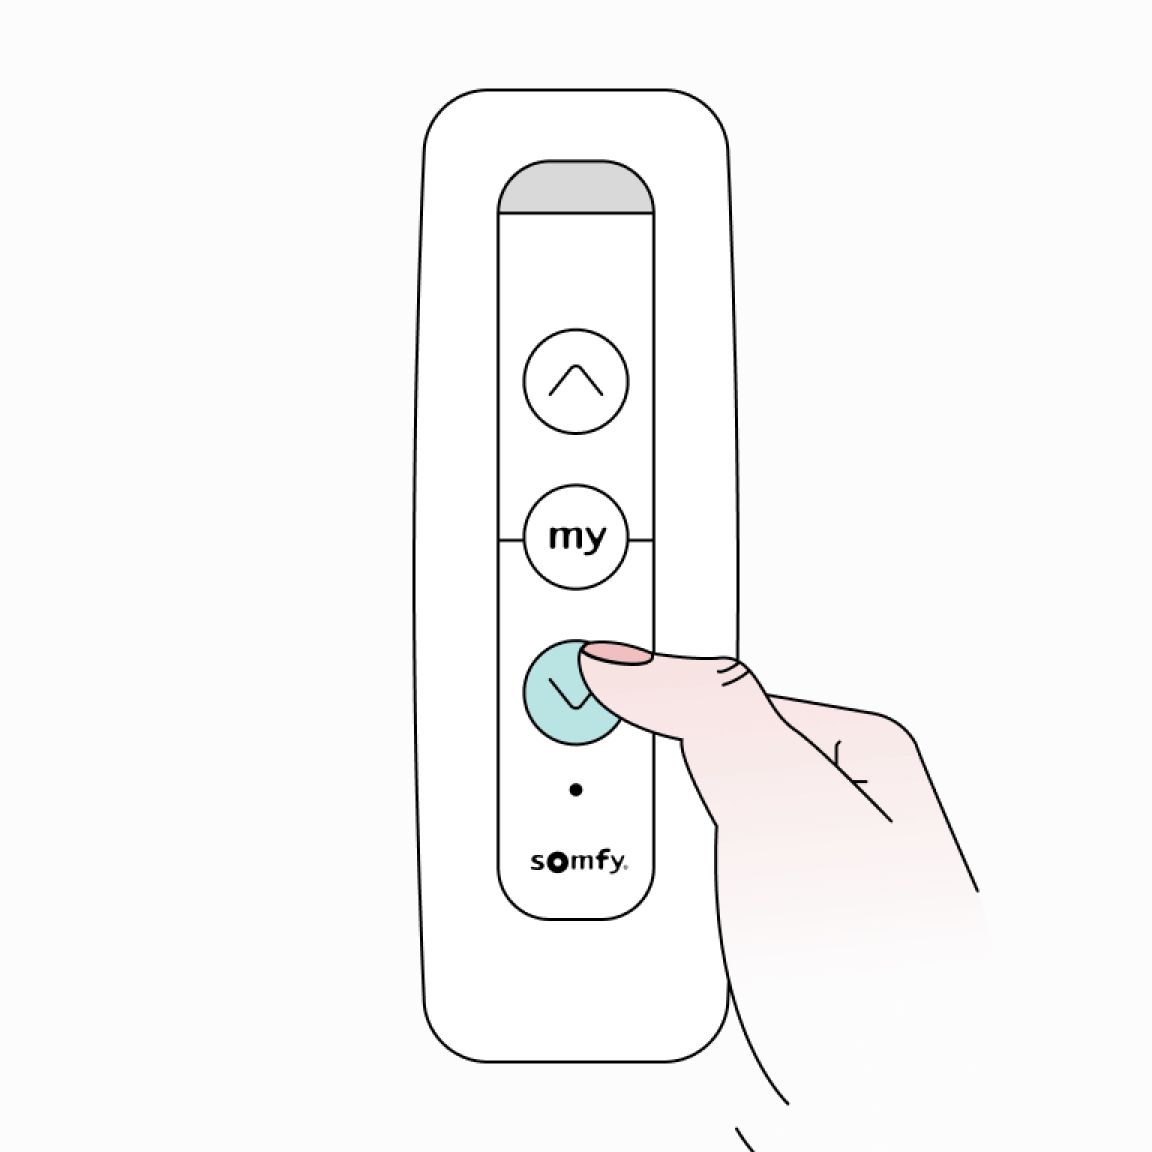
Using a paperclip or pen, press and hold the program button on the original remote until the blind jogs once.
Single & Multi - Channel Remote

2
Using a paperclip oe pen, press the program button on the second remote until the blind jogs once. Second remote is now deleted and will not operate the blind.
How to set up a new channel on a multi-channel remote
Multi-Channel Remote

1
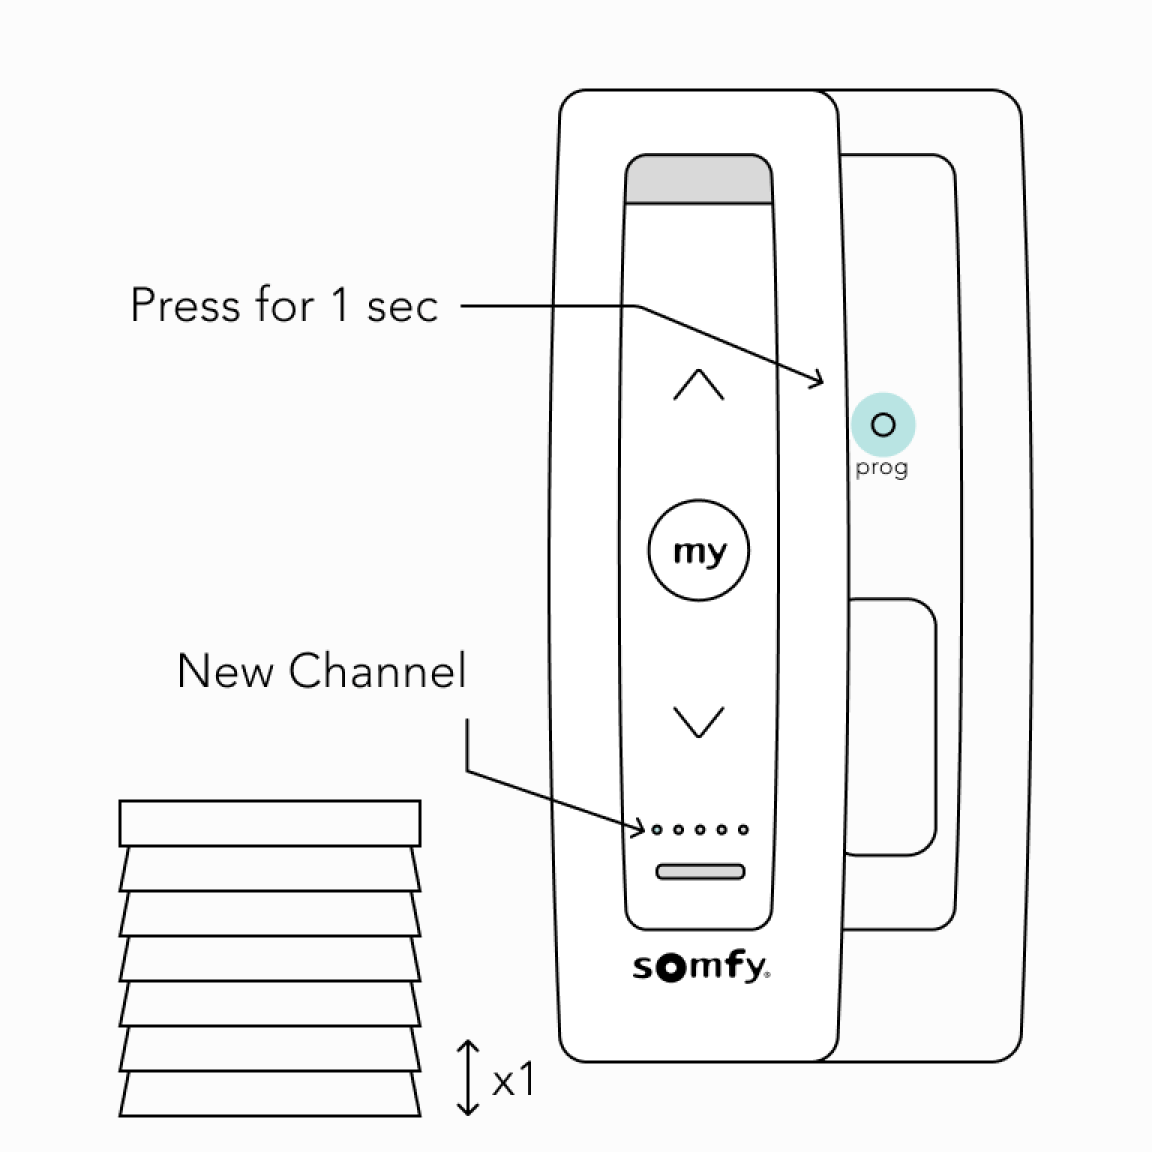
Select the desired channel you wish to duplicate by momentarily pressing the channel selector button on the multichannel remote.
Multi-Channel Remote

2
Using a paperclip or pen, press and hold the program button on the remote until the blind jogs once.
Multi-Channel Remote
3
Ensuring you are on the new channel press the program button on the remote until the blind jogs once. Additional (new) channel is now added to the motor memory and can be used to operate the blind.
How to delete a channel on a multi-channel remote
Multi-Channel Remote
1
On the remote select the desire channel to be deleted.
Multi-Channel Remote
2
Using a paperclip or pen, press and hold the program button on the remote until the blind jogs once.
Multi-Channel Remote

3
Press the program button on the remote until the blind jogs once. Channel is now deleted from the motor memory and will not operate the blind.
How to adjust motor speed
* Motor has 4 speed settings, each action decreases speed by 1. When lower speed has been reached, the blind will no longer respond.
Decreasing the tilt speed
1
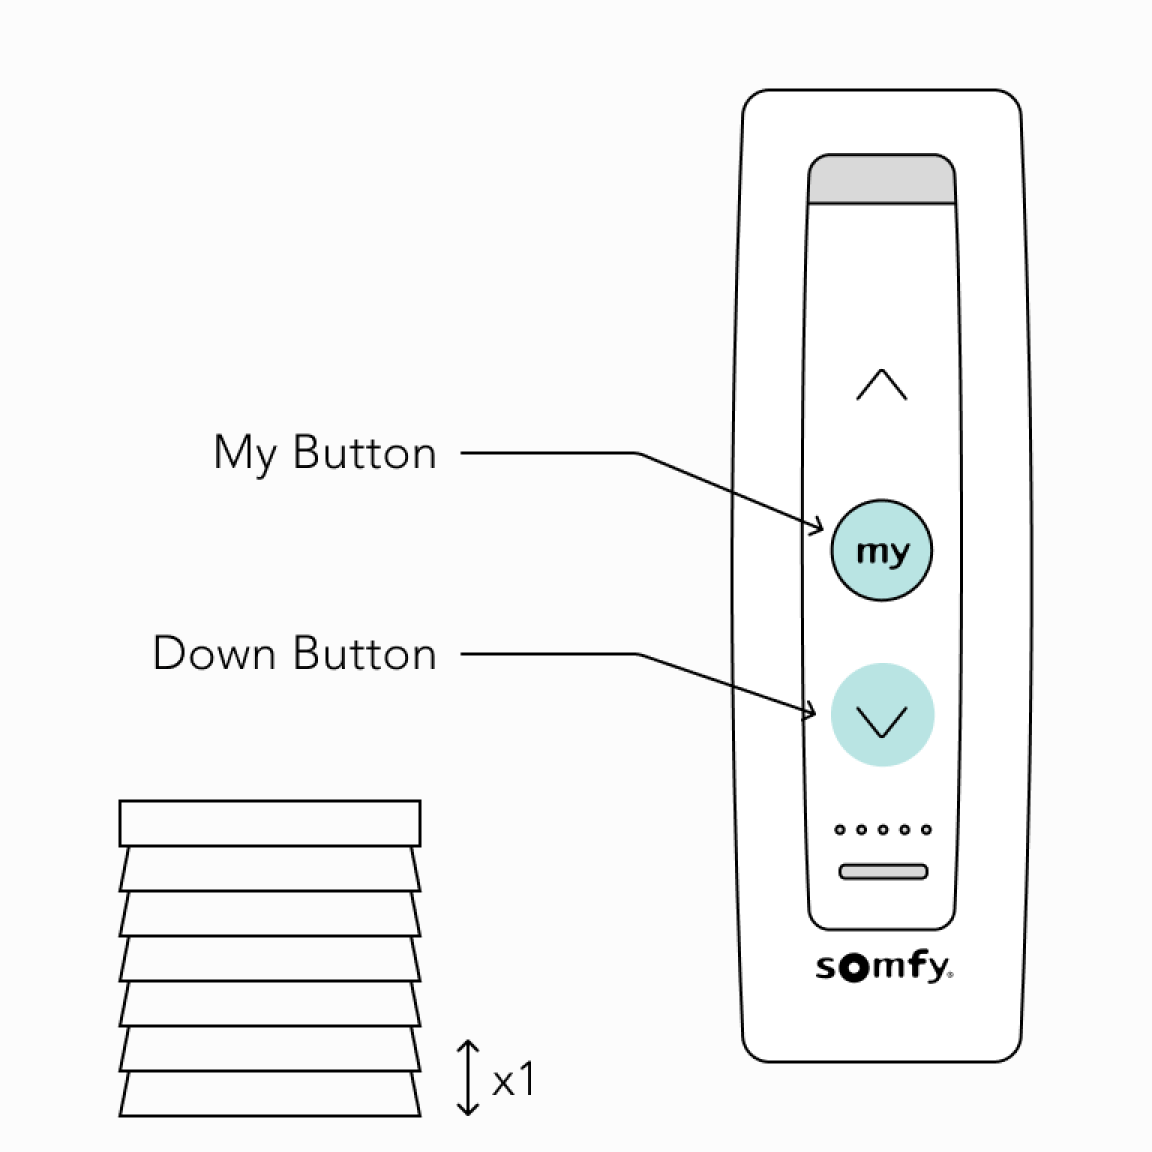
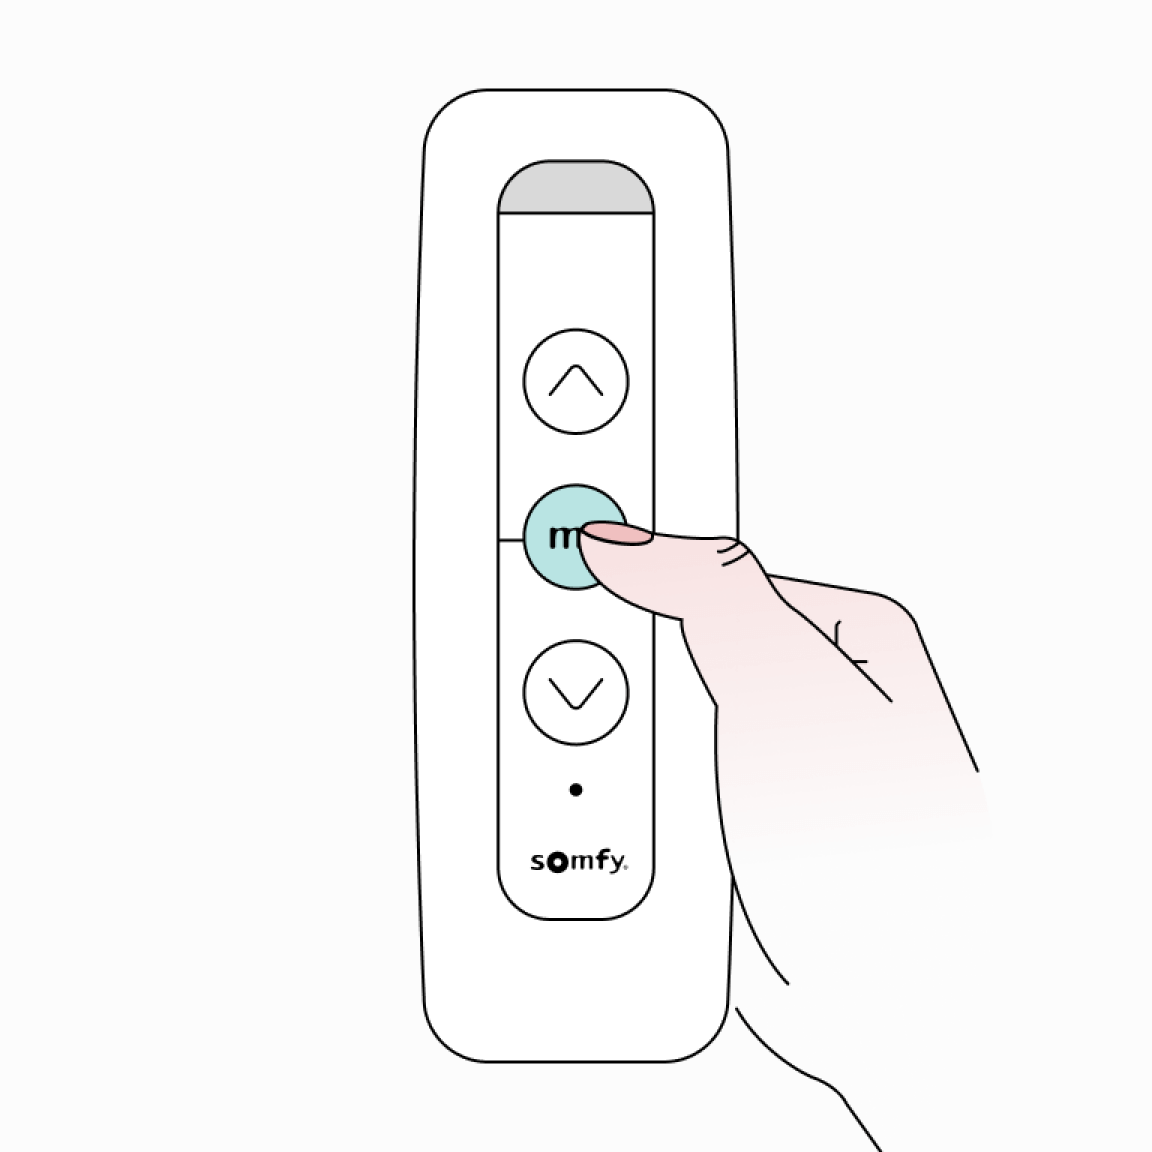
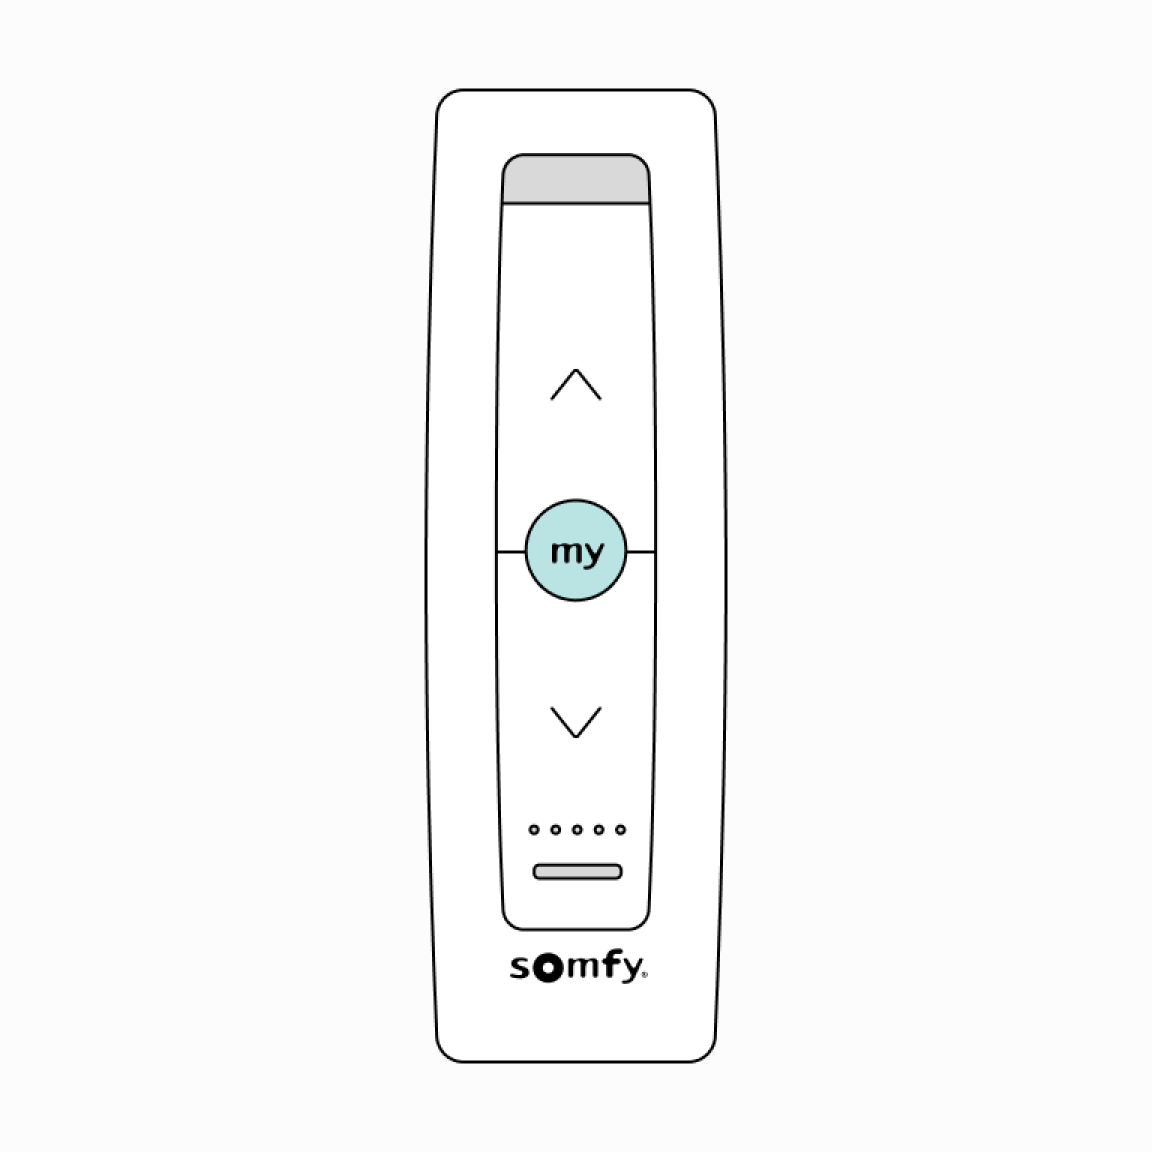
Press the MY (stop) and DOWN buttons until the blind jogs. Speed has been decreased by 1.
Decreasing the tilt speed
Important
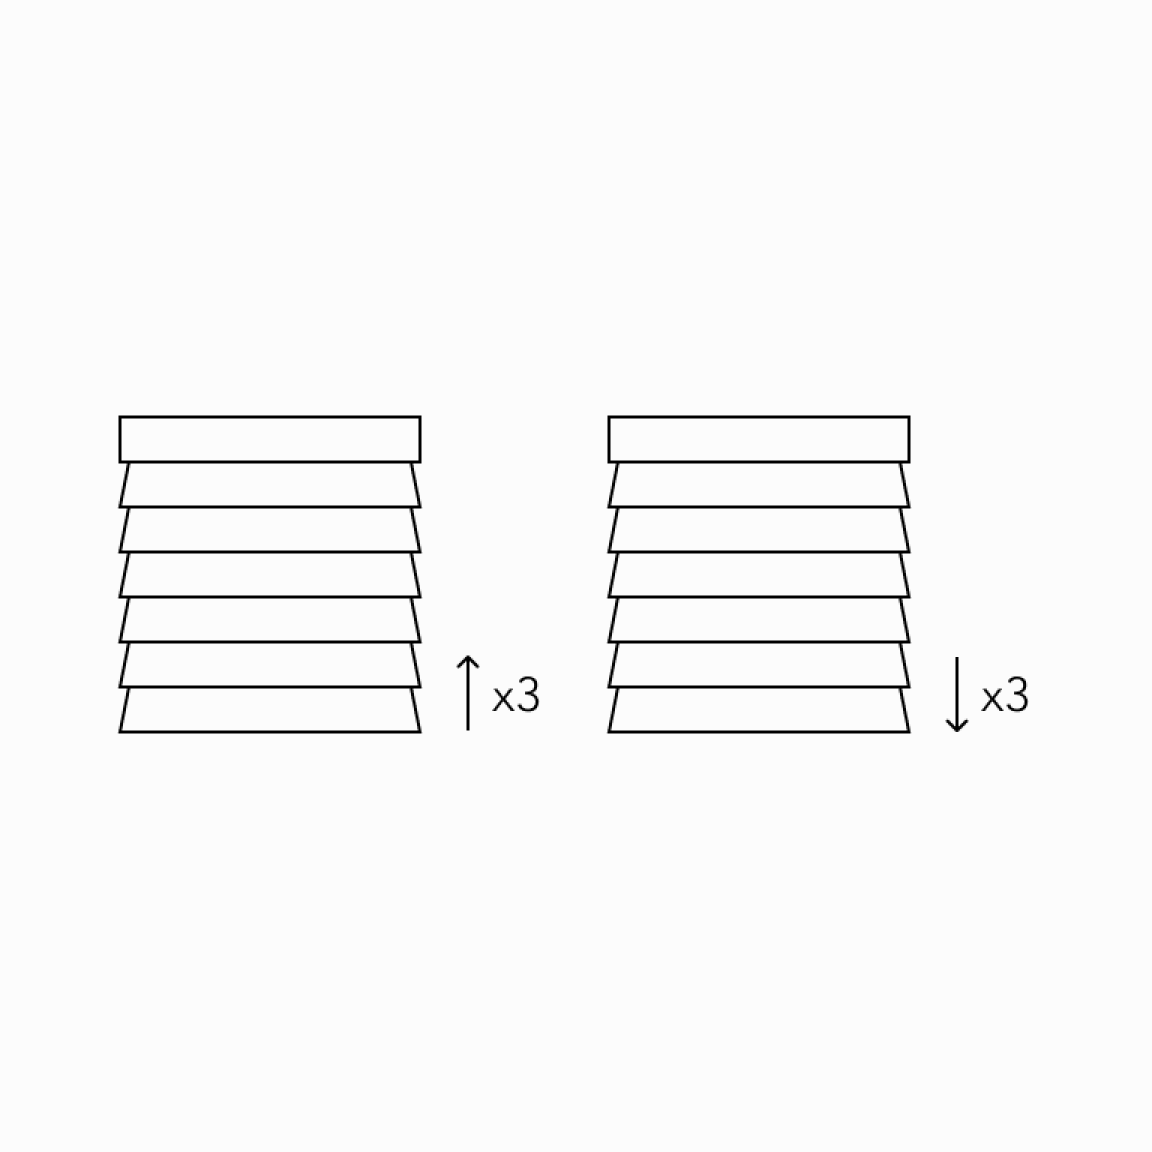
There are 4 speed settings, repeat as needed. The minimum setting has been reached when the motorised product briefly moves 3 times in one direction and then 3 times in the other direction.
Increasing the tilt speed

1
Press the MY (stop) and UP buttons until the blind jogs. Speed has been increased by 1.
Increasing the tilt speed

Important
There are 4 speed settings, repeat as needed. The maximum setting has been reached when the motorised product briefly moves 3 times in one direction and then 3 times in the other direction.
Restore to factory settings
*All remotes and limits will be erased from the motor memory. Motor is now reset to factory mode.
Delete all previous settings
1
Using a paperclip press and hold the program button located on the top of the motor casing until the blind jogs 3 times (approx. 12 secs.)
How to operate electric wooden blinds
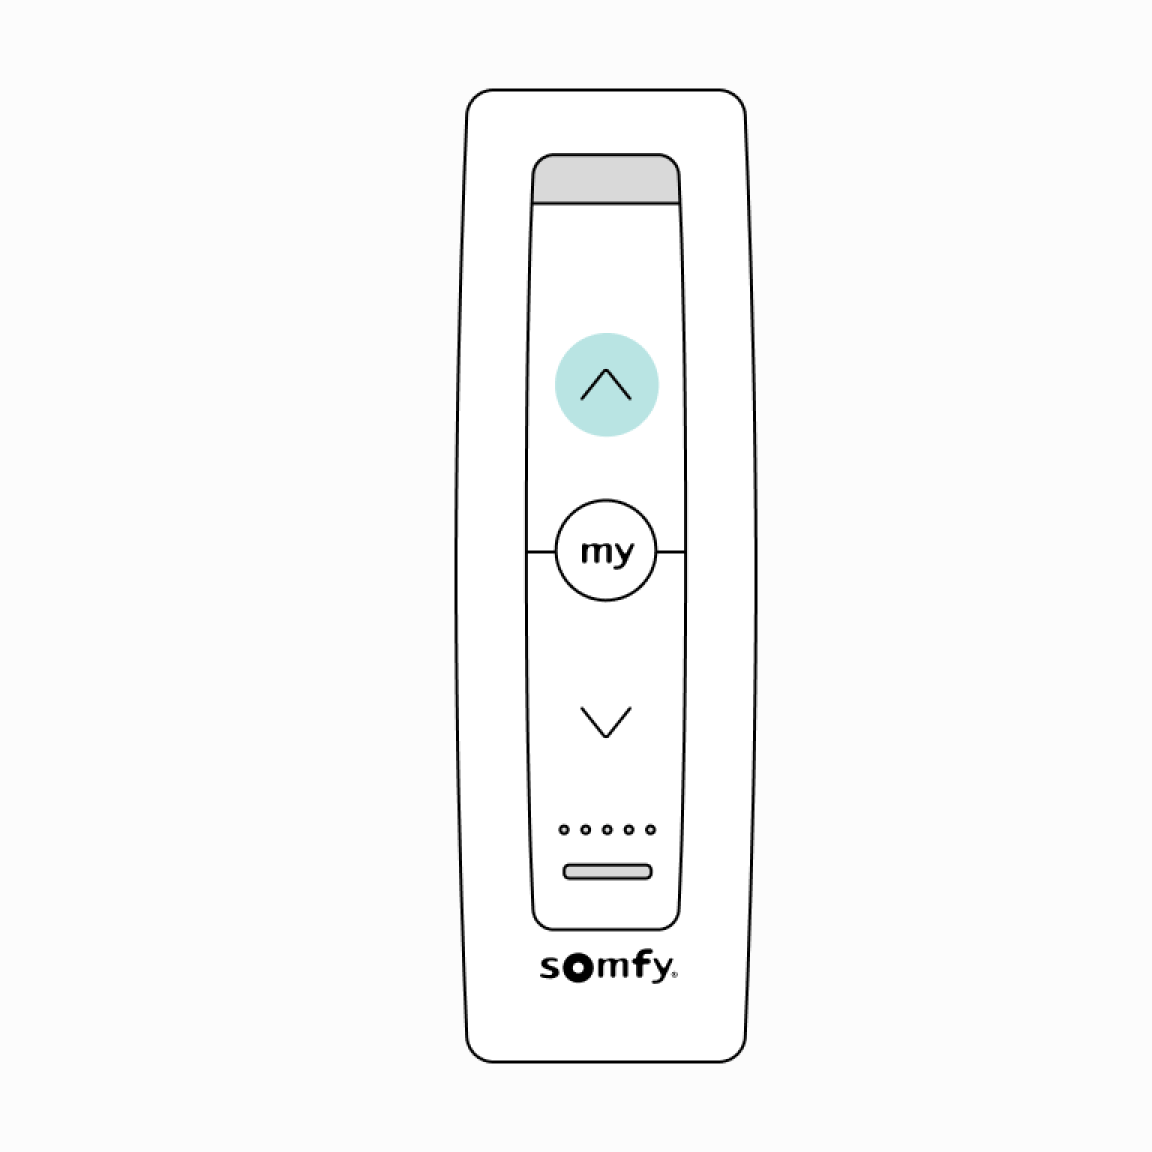
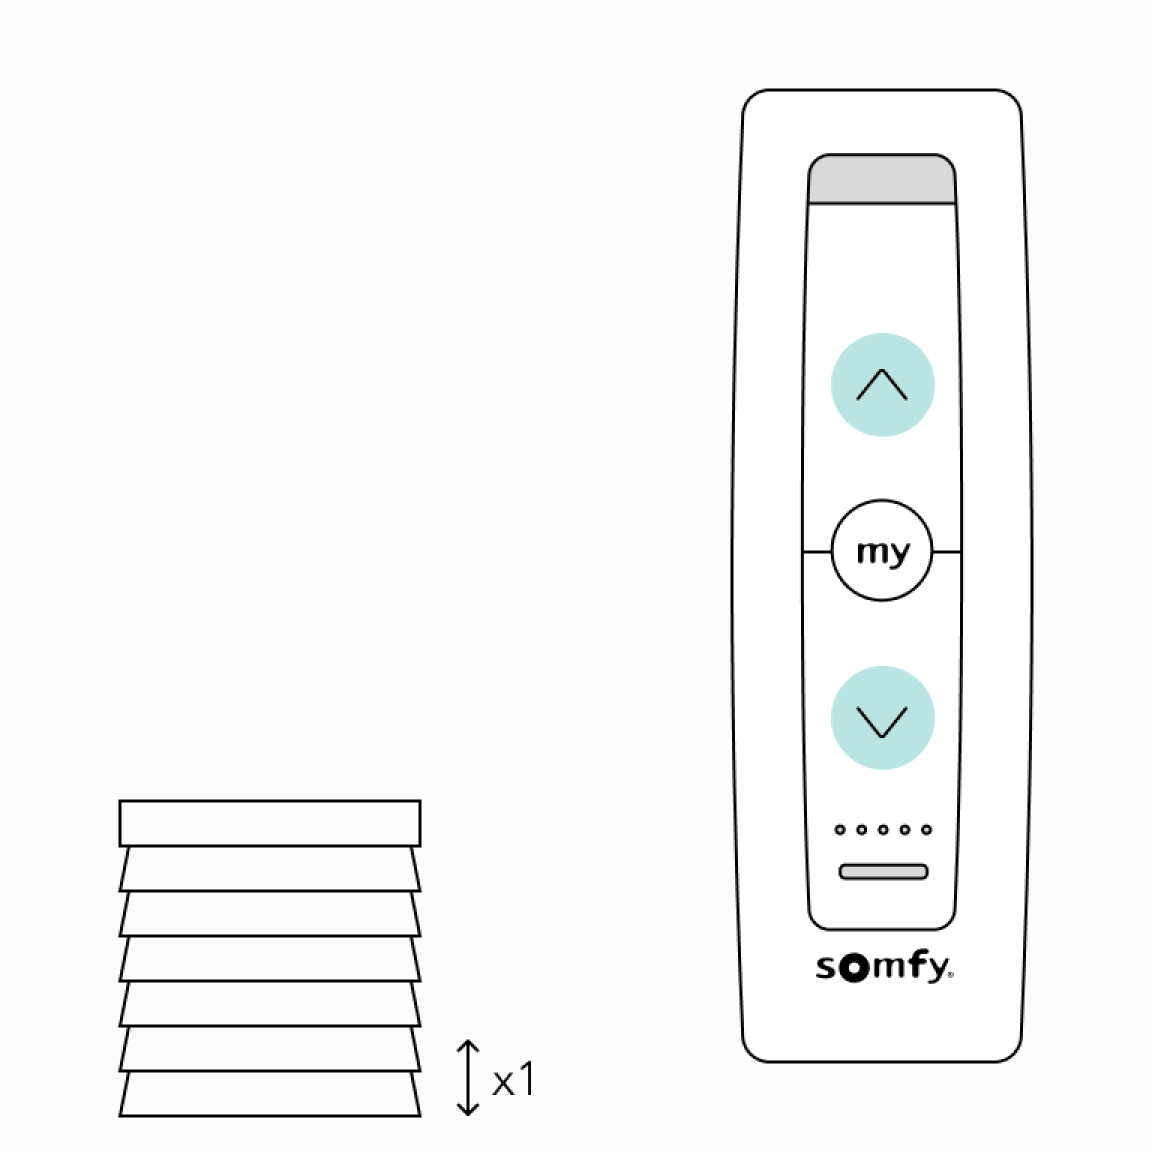
Tilting the slats up
Situo RTS
1
Press and hold the UP button to open the slats. Release the button when the desired position is reached.
Situo Var RTS
1
Press or scroll on the UP button/scroll wheel to open the slats. Press the MY button to stop the movement of the slats (button operation only).
Tilting the slats down
Situo RTS
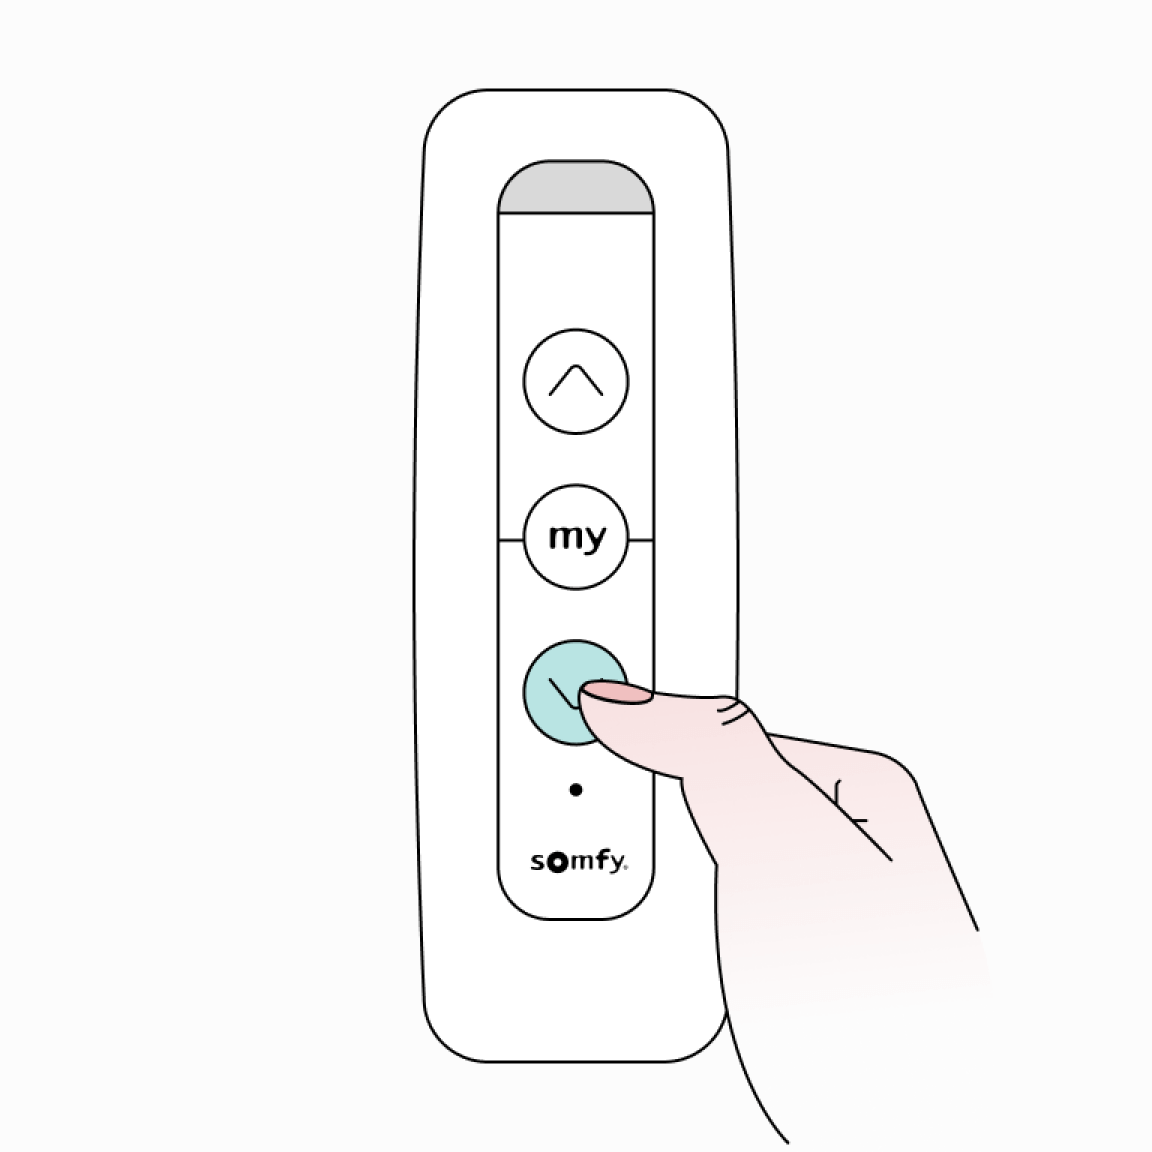
1
Press and hold the DOWN button to close the slats. Release the button when the desired position is reached.
Situo Var RTS
1
Press or scroll on the DOWN button/scroll wheel to close the slats. Press the MY button to stop the movement of the slats (button operation only).
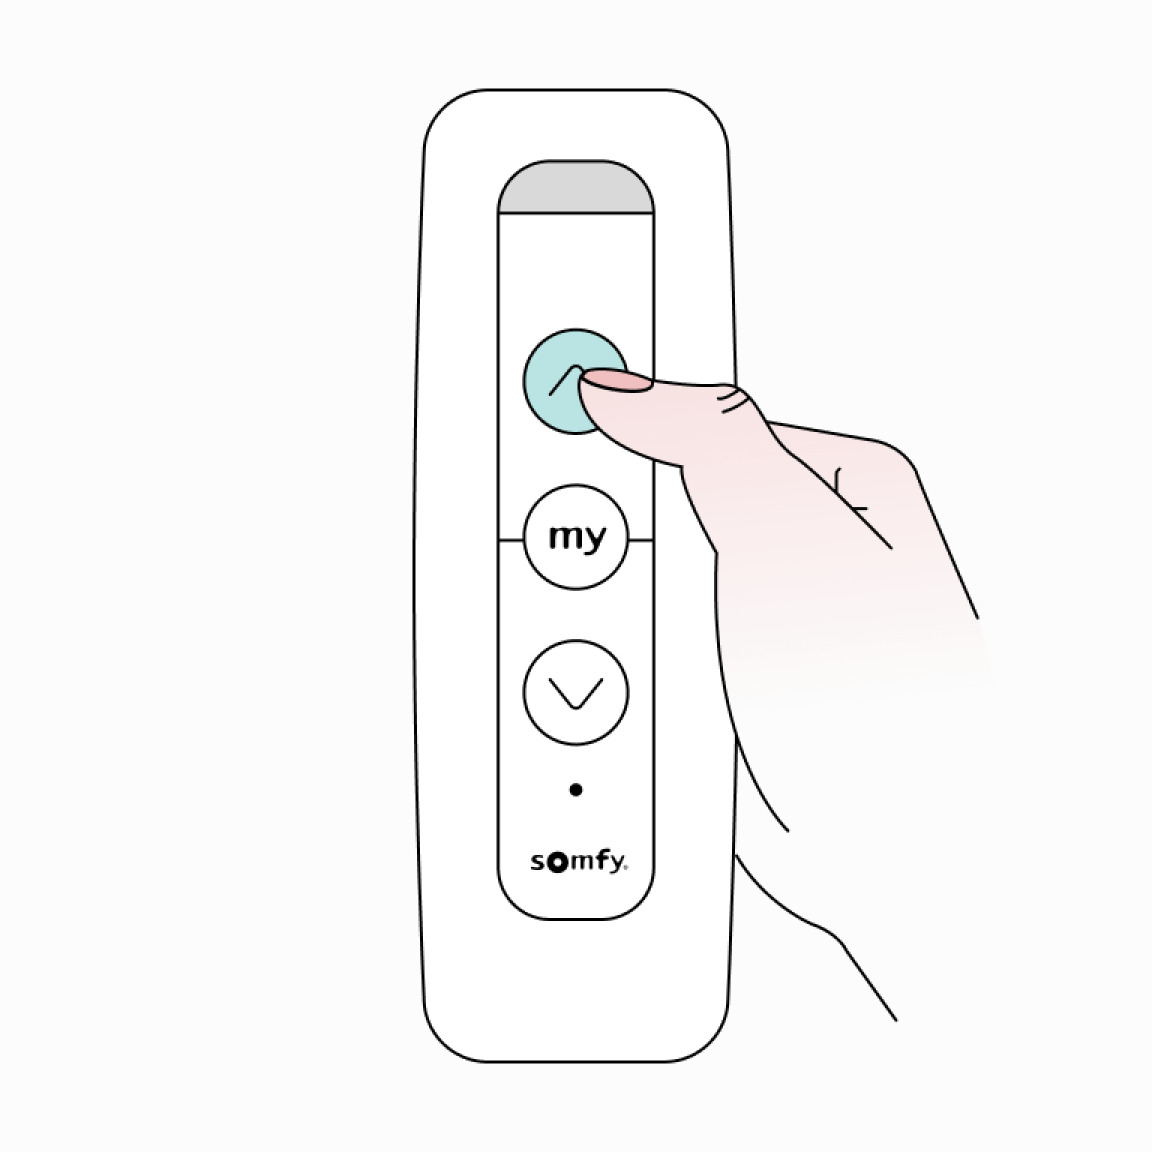
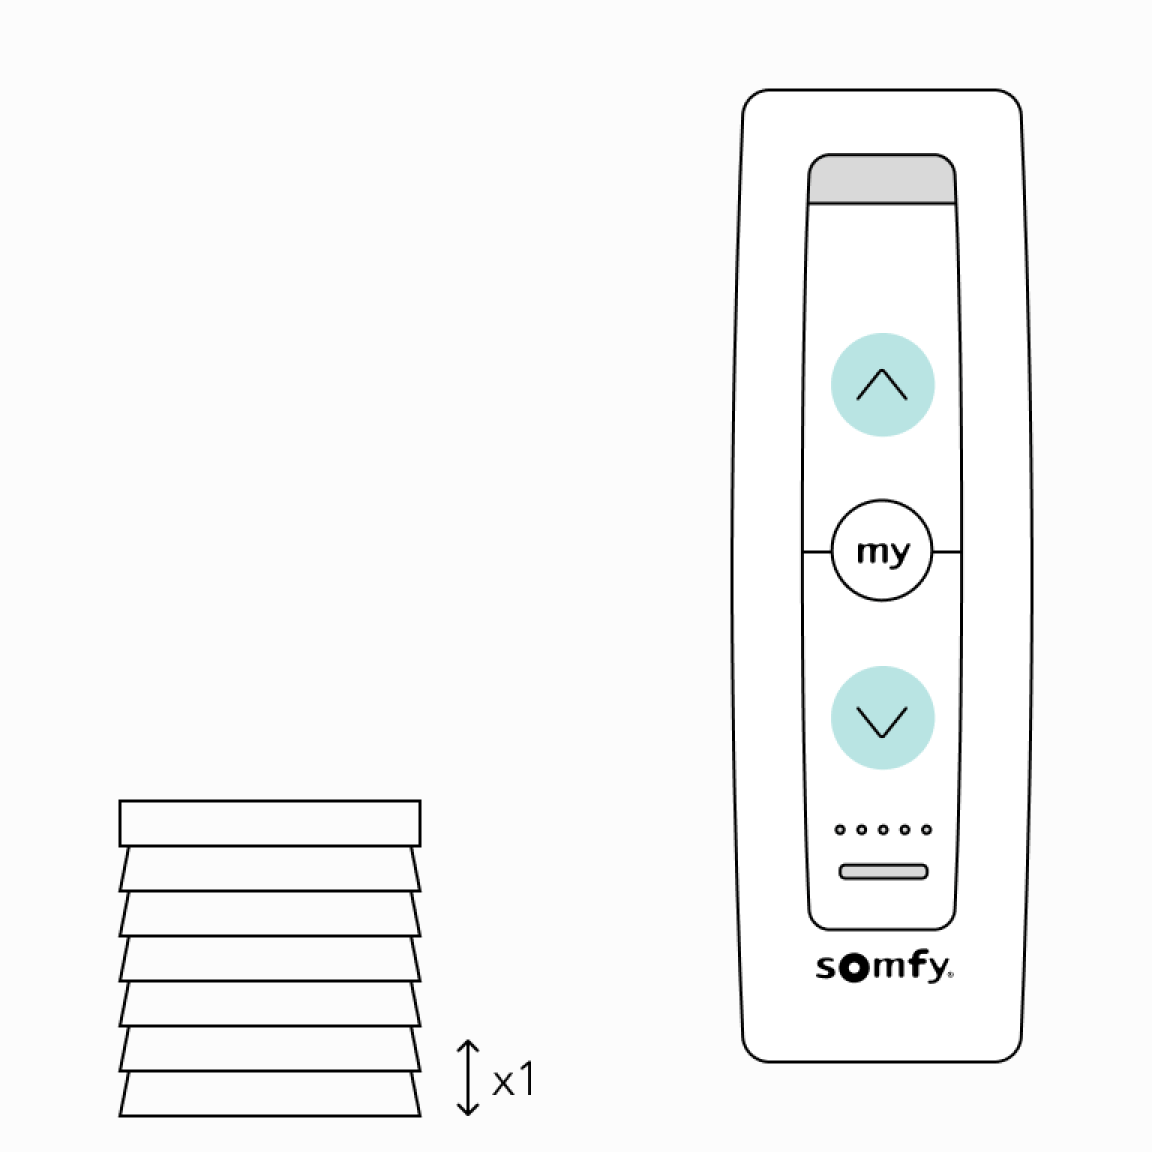
Lifting the blinds up
Situo RTS

1
Briefly press the UP button to lift the blinds.
Situo RTS

2
Press the MY button when the desired position is reached.
Situo Var RTS
1
Press the UP button to lift the blinds.
Situo Var RTS

2
Press the MY button when the desired position is reached.
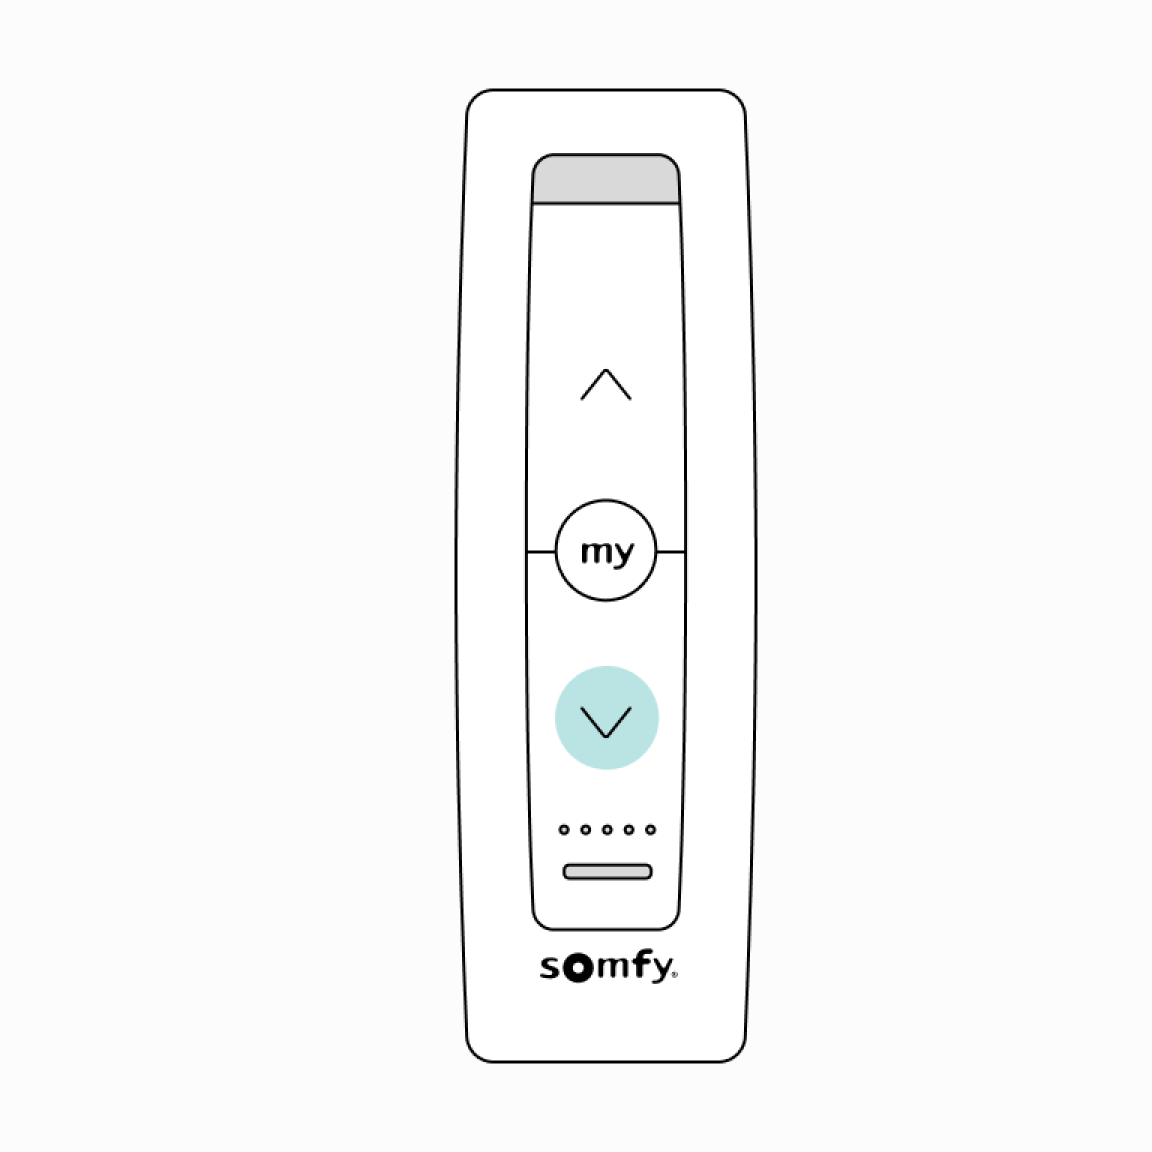
Lowering the blinds down
Situo RTS
1
Briefly press the DOWN button to lower the blinds.
Situo RTS
2
Press the MY button when the desired position is reached.
Situo Var RTS

1
Briefly press the DOWN button or scroll DOWN the wheel to lower the blinds.
Situo Var RTS
2
Press the MY button when the desired position is reached.
How to adjust slat tilt positions
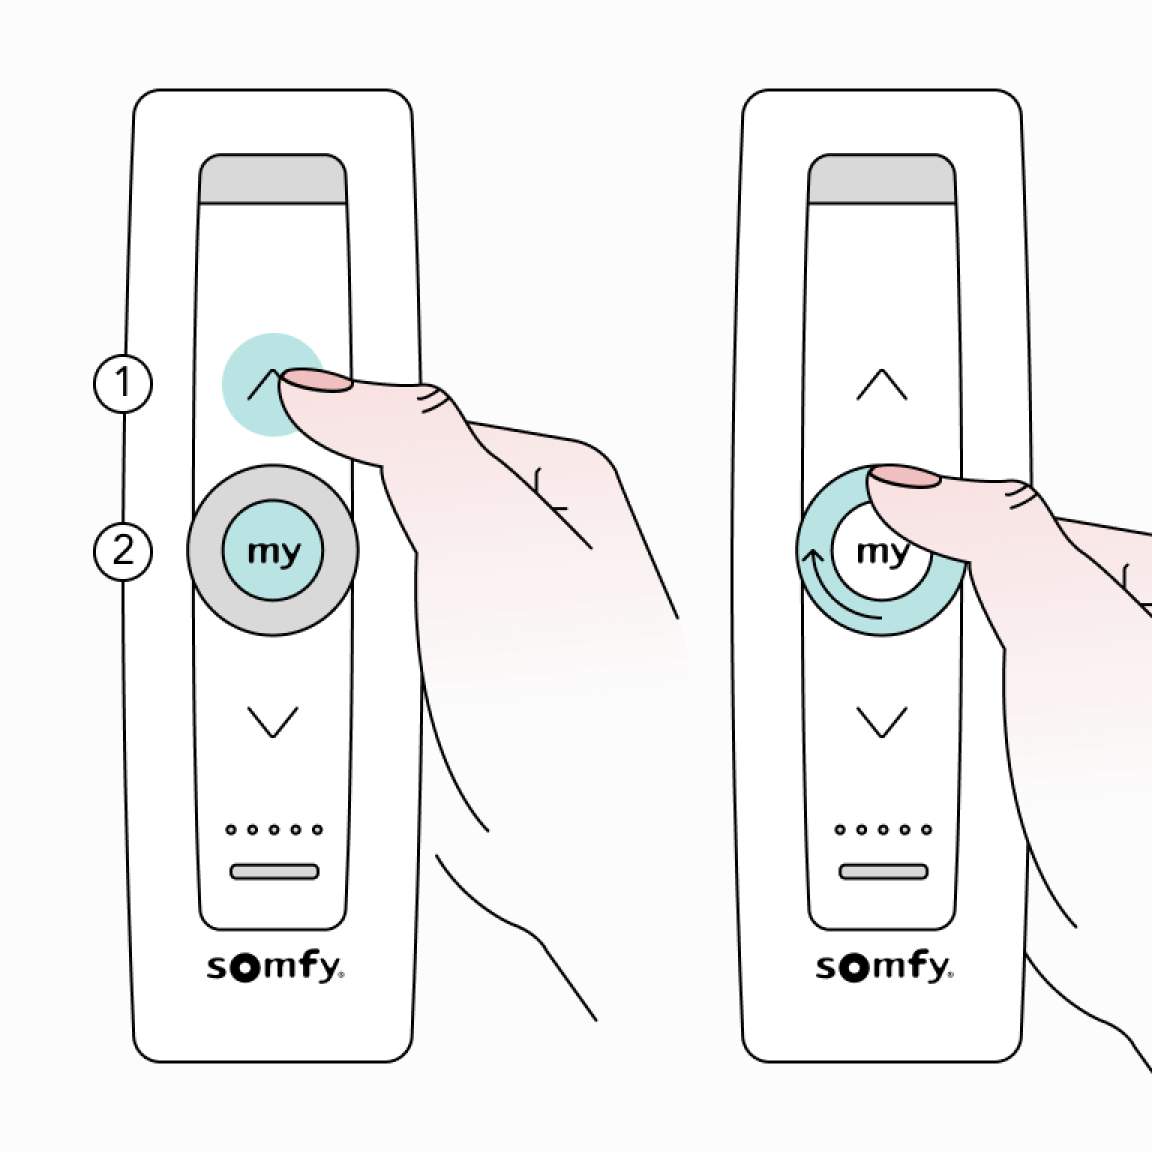
How to adjust upward slat tilt position
Single and Multi Channel Remote
1
Press the UP button. Blind will tilt to the pre-set UP limit.
Single and Multi Channel Remote
2
Once the blind stops at the pre-set upper limit, press and hold the UP and DOWN buttons simultaneously until the blind jogs.
Single and Multi Channel Remote

3
Press and hold either the UP or DOWN button to adjust slats to the new position.

4
Press and hold the MY (stop) button until the blind jogs. New Upper Limit (up stop position) is now added to the memory.
How to adjust downward slat tilt position
Single and Multi Channel Remote
1
Press the DOWN button. Blind will tilt to the pre-set DOWN limit.
Single and Multi Channel Remote

2
Once the blind stops at the pre-set down limit, press and hold the UP and DOWN buttons simultaneously until the blind jogs.
Single and Multi Channel Remote
3
Press and hold either the UP or DOWN button to adjust slats to the new position.

4
Press and hold the MY (Stop) button until the blind jogs. New Lower Limit (down slat position) is now added to the memory.
How to program lift positions
How to set the intermediate lift position (My/favourite position)
Single and Multi Channel Remote
1
Press the UP or DOWN button until the blind slats reach a desired favourite position, then press the MY (stop) button to stop. If necessary, adjust the desired slat position by pressing and holding either the UP or DOWN button.
Single and Multi Channel Remote

2
Press and hold the MY (stop) button until the blind jogs. Favourite my slat position is now added to the memory.
Single and Multi Channel Remote
3
Activate the blind favourite position by pressing the MY (stop) button from any slat position. Slats will move to the closed down position prior to stopping at the programmed my position.
How to adjust the upper lift position
Single and Multi Channel Remote

1
Press the UP button to move the blind to the upper end limit.
Single and Multi Channel Remote
2
Press and hold the UP and DOWN buttons simultaneously until the blind jogs.
Single and Multi Channel Remote

3
Press and hold either the UP or DOWN button to adjust slats to the new position.

4
To confirm the new limit press and hold the MY (stop) button until the blind jogs.
How to adjust the lower lift position
Single and Multi Channel Remote

1
Press the DOWN button to move the blind to the lower end limit.
Single and Multi Channel Remote

2
Press and hold the UP and DOWN buttons simultaneously until the blind jogs.
Single and Multi Channel Remote

3
Press and hold either the UP or DOWN button to move the blind to the new desired position.
4
To confirm the new limit press and hold the MY (stop) button until the blind jogs.
How to adjust the intermediate lift position (My/favourite position)
Single and Multi Channel Remote

1
Press the UP or DOWN button until the blinds reach the desired favourite position.
Single and Multi Channel Remote

2
Press the MY button until the blind jogs. Favourite position has now been set.
FAQs about setting up electric wooden blinds
Can electric wooden blinds be integrated with smart home systems?
Yes, electric wooden blinds can be integrated with popular smart home systems, such as Amazon Alexa, Google Home, and Apple HomeKit. This allows you to control your blinds using voice commands, smartphone apps, and routines. To integrate electric wooden blinds with a smart home system, you'll need to purchase a connectivity kit. This kit connects your blinds to your other compatible smart home devices.
Can I control my electric wooden blinds with my voice?
Yes, if you have integrated your electric wooden blinds with a smart home system that supports voice control, you can control them using voice commands. For example, you could say "Alexa, open the living room blinds" or "Hey Google, close the bedroom blinds."
Can I program my electric wooden blinds to open and close automatically?
Yes, electric wooden blinds can be programmed to open and close automatically on a schedule. This is useful for controlling your blinds when you're away from home or for adjusting them to the sunrise and sunset times. You'll need a connectivity kit to link your blinds to your smartphone.
Having trouble setting up your electric wooden blinds?
Our team of highly trained customer support representatives are here to help. Give us a call at 0370 218 7042 or start a live chat with us today.