How to Install Perfect Fit Shutters
Transform your space with Perfect Fit shutters! Designed for a sleek, no-drill installation, these shutters fit directly into your window frame for a flawless, integrated look. Our step-by-step guide makes the process quick and easy, so you can enjoy your stylish shutters in no time. Follow along for tips to achieve a perfect fit!
Fitting Guide
Step 1

Attach the Brackets
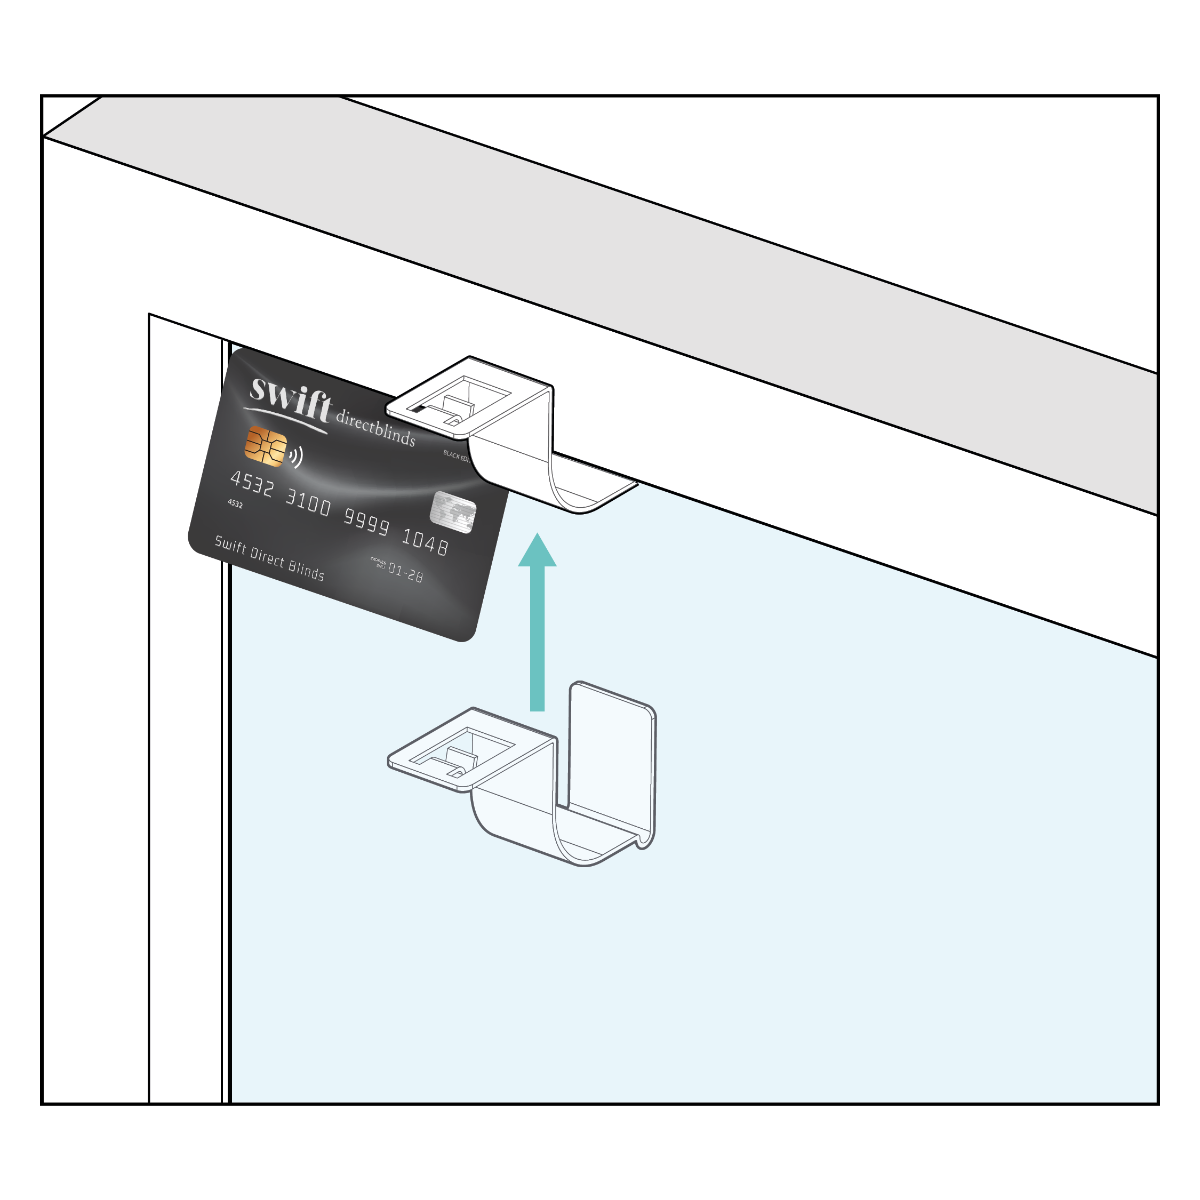
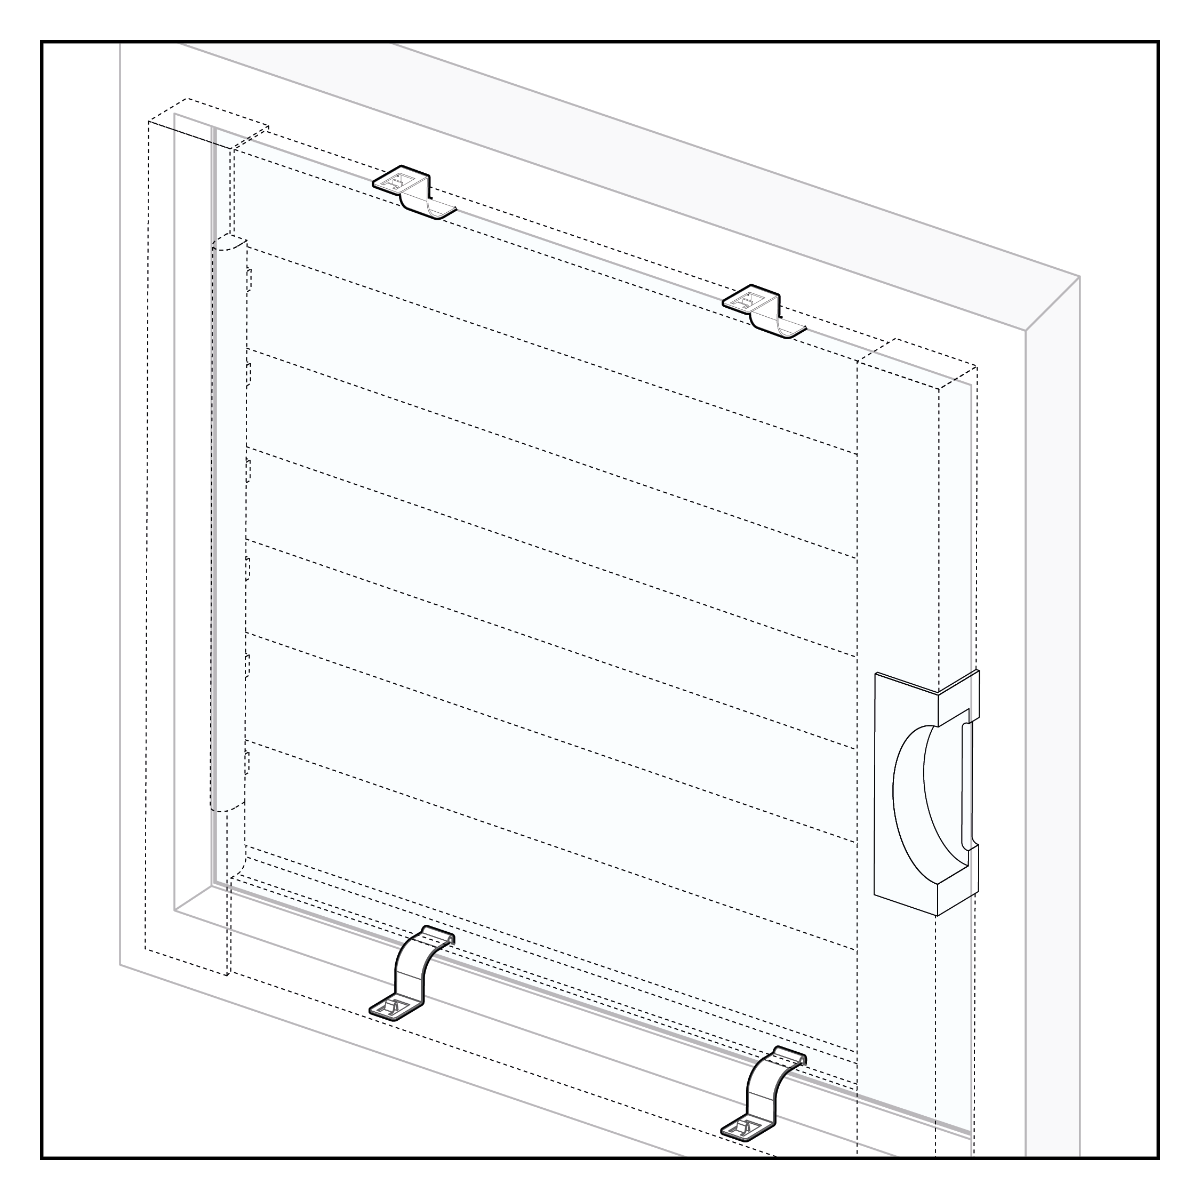
The brackets slide in between the glass and the rubber seal. 2 brackets are inserted at the top of the window and 2 at the bottom of the window. Using a credit card line the brackets up with the edge of the card and slide the brackets into place.
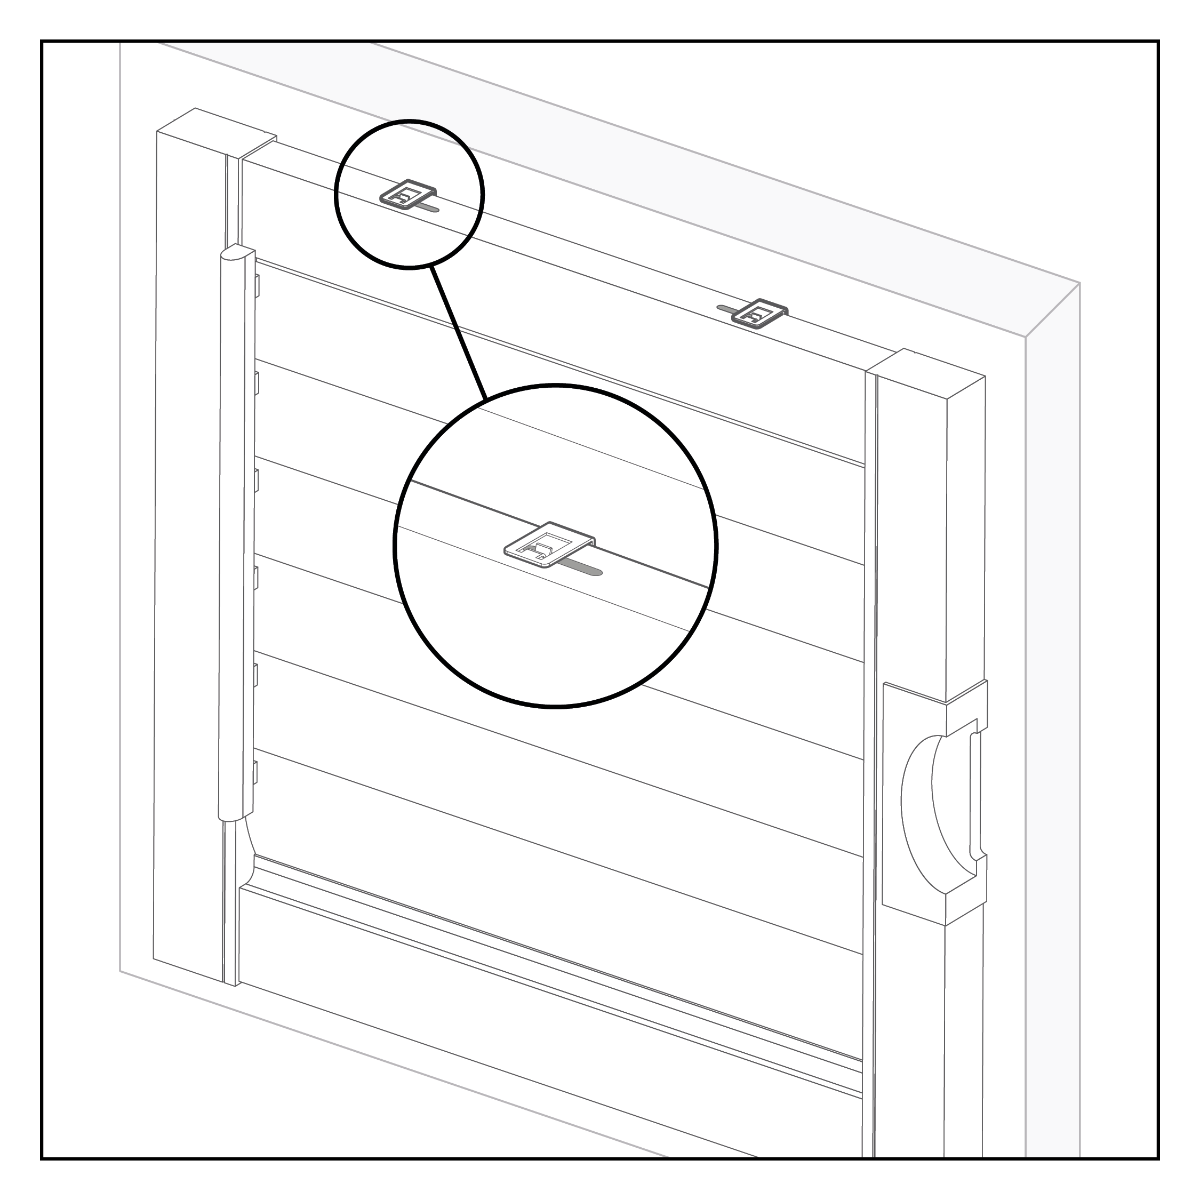
Note:For taller shutters, a ‘midrail’ may be added to enhance the stability of the shutter panel. If your shutter includes a midrail, you will receive two additional brackets for installation into the side frames of the window. A notch will be created in each side frame of the shutter, aligning with the midrail’s center. Utilize either the midrail measurement or the shutter panel itself as a guide to accurately position the side brackets.
Top Tip: If your perfect fit shutter has multiple panels more brackets will be supplied. Line up the extra brackets with the notches in the panel.
Step 2
Attach the shutter to the brackets
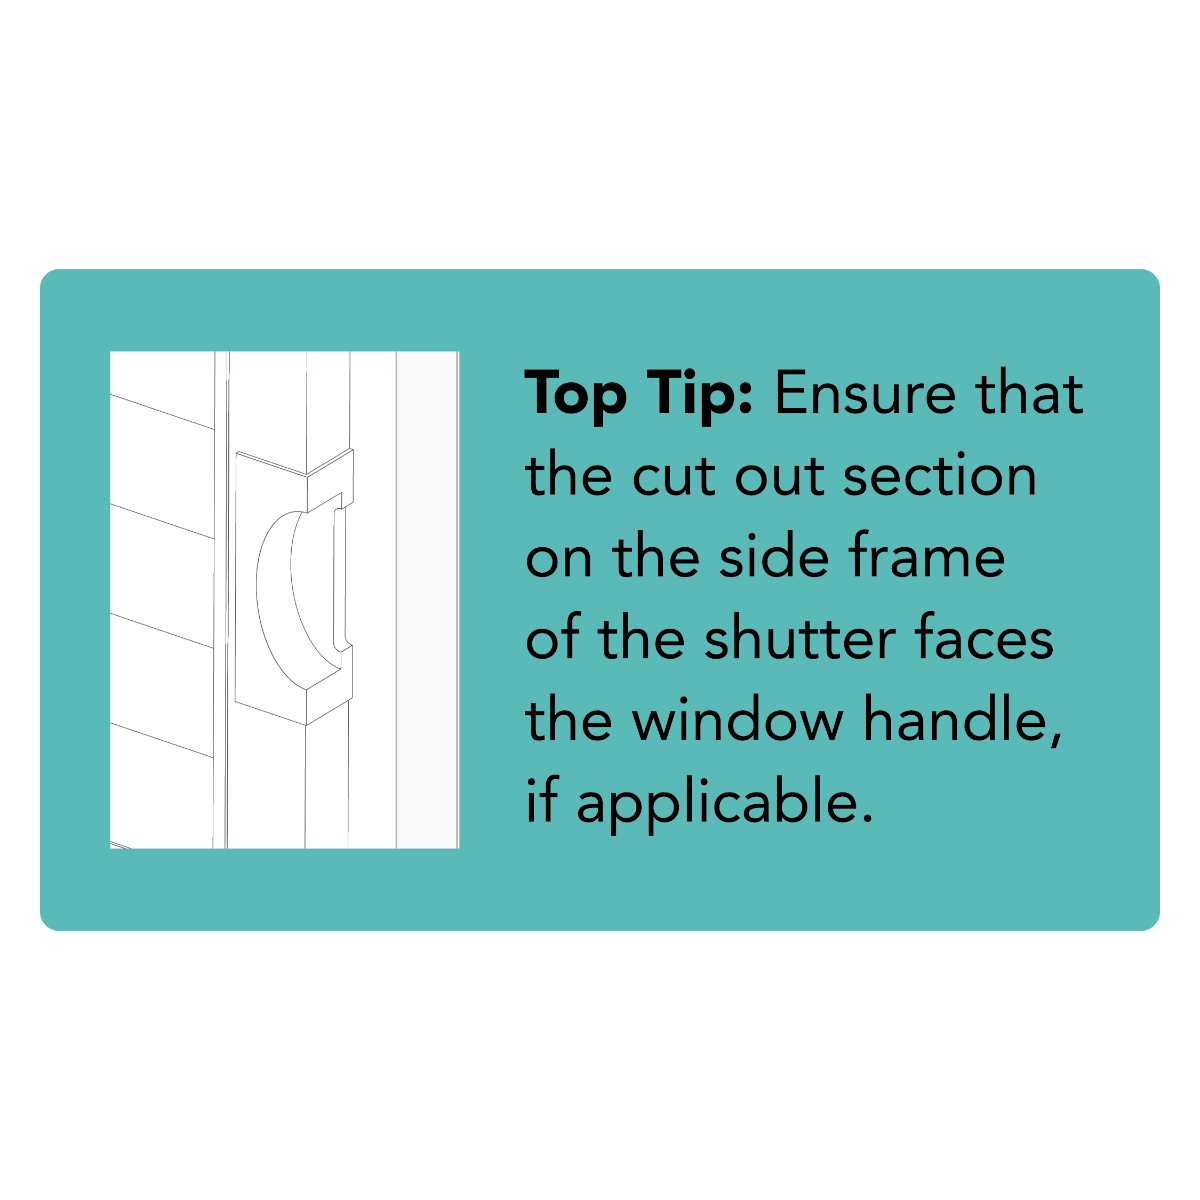
After positioning all the brackets, your shutter is prepared for installation. Align the cutout at the bottom of the frame with the bottom brackets. Once the bottom of the frame is securely clipped into place, press the top side of the frame into the top brackets.
Child Safety!
Attach the shutter to the brackets
Perfect Fit Shutters are inherently designed to be child-safe; however, like all window coverings, they may present risks if used improperly or installed in unsafe locations. To maximize safety, please relocate all beds, cots, or climbable furniture away from the windows where shutters are installed. While the shutters carry minimal risk of choking or strangulation, there is a possibility of them being pulled off the brackets, posing a risk of crushing or injury.