How to Install Clic Fit Blinds
Forget fumbling with tools! Installing clic fit blinds is a walk in the park. This guide will take you through the quick and easy steps to seamlessly clip your blinds in and transform your windows in minutes.
How do Clic fit blinds work?
Clic fit Blinds work by raising and lowering them with the pull down handle. Venetian styles let you fine-tune light and privacy with a quick twist of the included wand.
How to Install Clic fit blinds - Step by step
What comes with my Clic fit blind?
As well as your clic fit blinds, you'll find four brackets and two adhesive strips within the box. No screws and no drilling means you don't need any extra tools..
Step 1
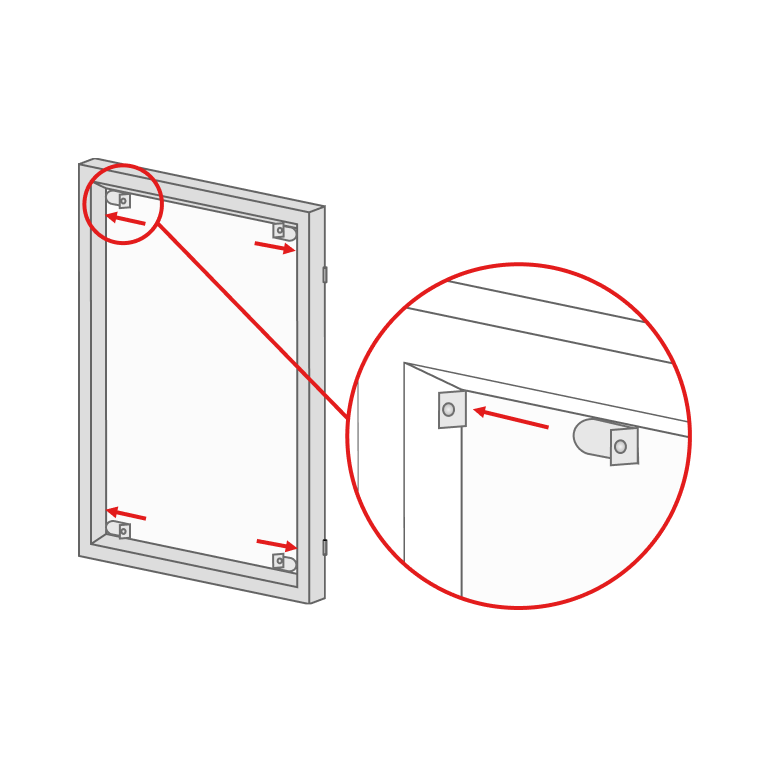
Fit the brackets
Place the bracket flat to the glass and push it towards the window frame, ensuring it slides in under the rubber seal. Push the bracket in as far as possible. Do the same with the other three brackets in the other corners of the glass, as shown in the diagram.
Step 2
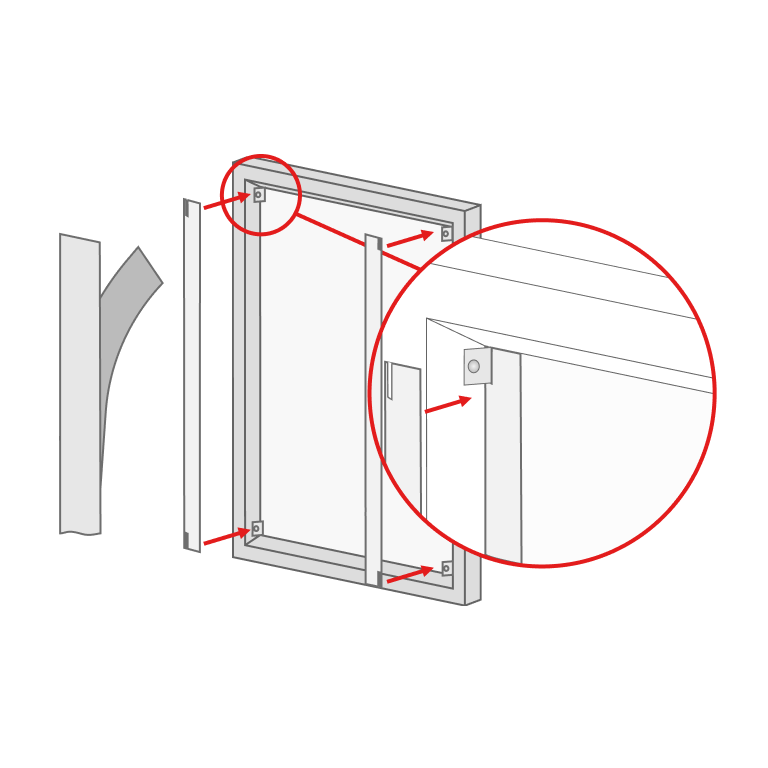
Applying the side profiles
First remove the backing paper from the self-adhesive strips.
Place the strip so that the cut-outs go on either side of the brackets.
Step 3
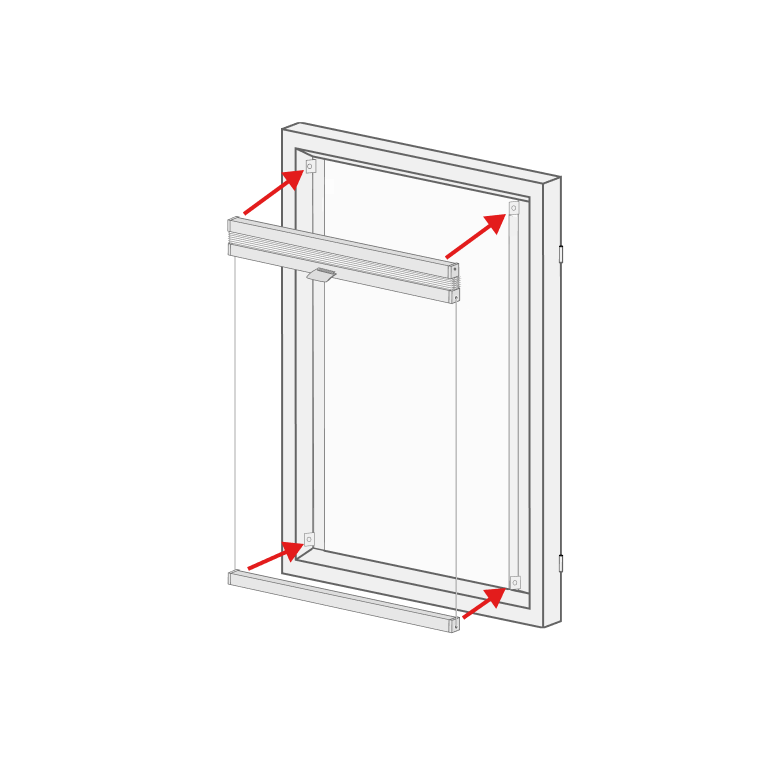
Install the blinds
Locate the slot on the back of the left and right side of the headrail onto the exposed brackets. Gently push first the headrail and then the bottom rail onto the exposed bracket. Ensure the raised circle on the exposed bracket is located in the hole on the plastic head and bottom rail end caps. The cord tension can be adjusted using the small spring inside the bottom rail.
Step 4
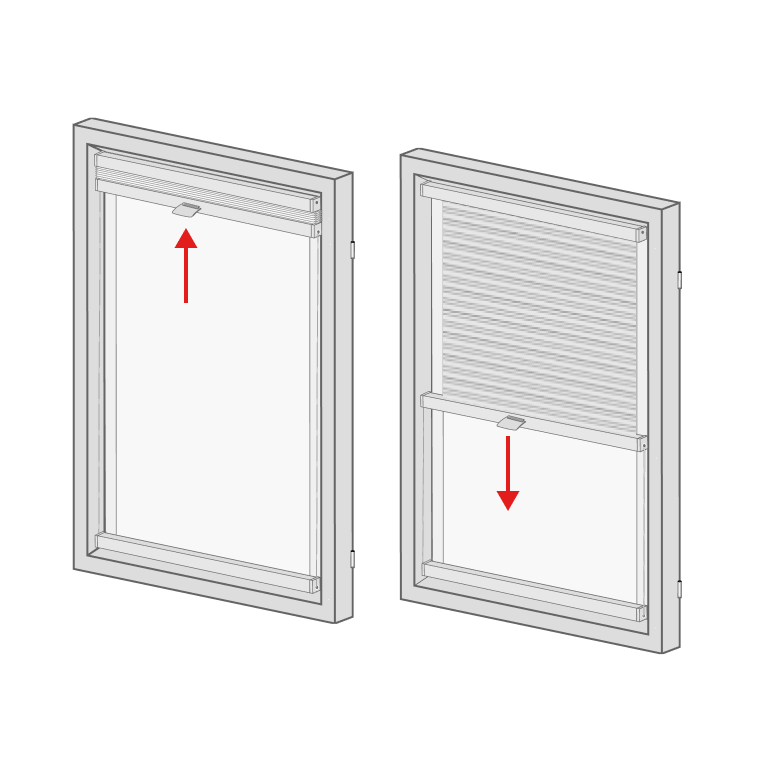
Operating your Clic Fit Blinds (Pleated/Honeycomb)
To raise and lower the blinds simply pull up and down using the handle. The clever, fold away handle makes it ideal to use on bi-fold doors where it is important that the blind does not protrude further than the window frame.
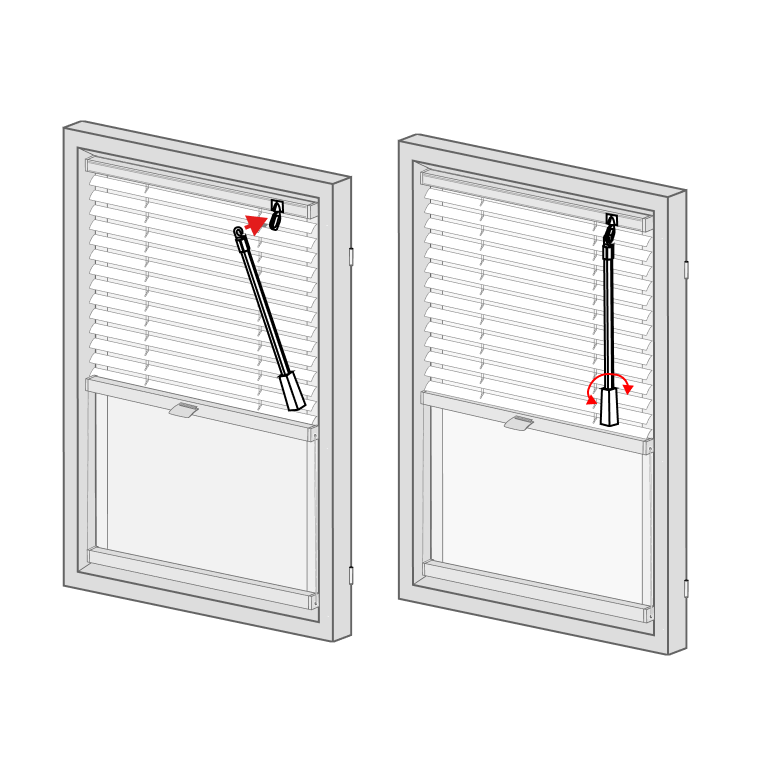
Operating your Clic Fit Blinds (Venetians)
Attach the plastic wand by hooking the wand onto the tilt mechanism on the venetian blind. Twist the wand to open and close the slats.